Is Your Bathroom Sink Installed Backwards?
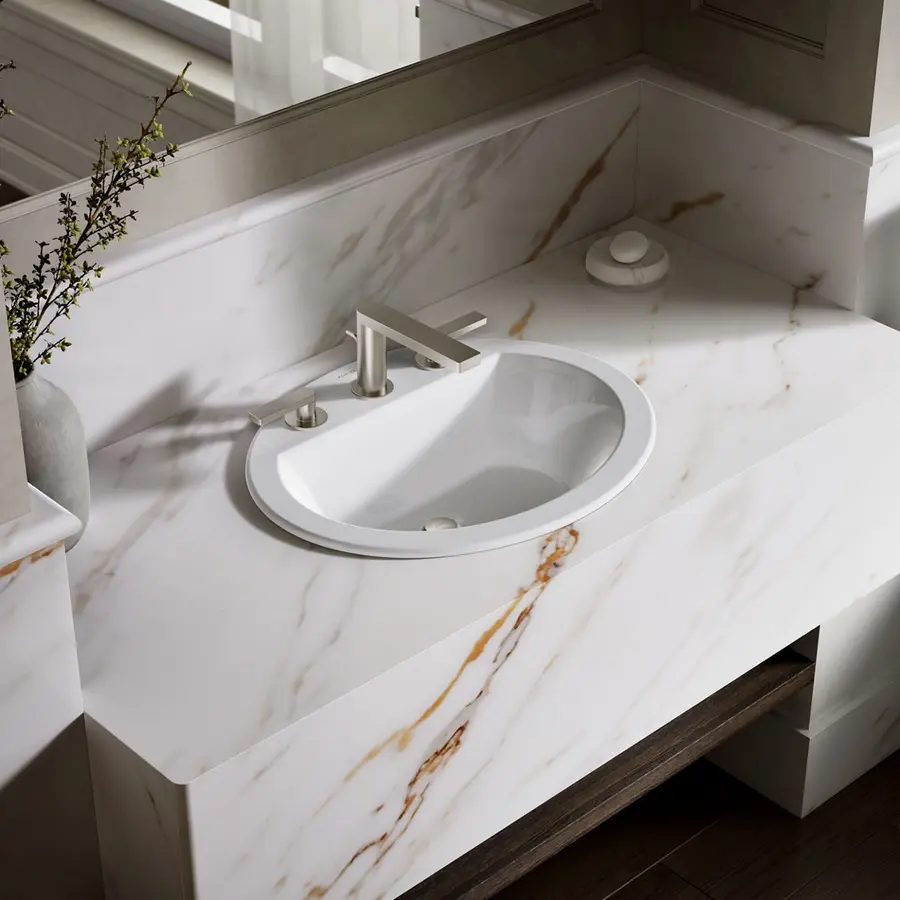
If a bathroom sink looks backwards after installation, do not rely on the logo, drain location, or bowl shape alone. The intended direction is usually confirmed by the manufacturer’s installation diagram and by several features working together: the overflow opening, faucet-hole layout, mounting hardware, drain placement, and the shape of the bowl.
An unusual-looking installation is not automatically wrong. Some sinks are designed with the drain closer to the rear, a broad flat area near the user, or an overflow opposite the faucet. But if the faucet, overflow, drain, or mounting system do not match the manufacturer’s drawing, ask the installer to check it before caulk, countertop work, or final plumbing connections make a correction more involved.
Start With the Manufacturer’s Installation Diagram
The installation sheet for the exact sink model is the best answer to which way should a bathroom sink face. Look for the model number on the box, invoice, underside of the sink, or product listing, then compare the installed sink with the manufacturer’s top-view and underside drawings.
Pay attention to these details in the diagram:
- The stated front, back, or faucet side
- Overflow location
- Faucet-hole position and spacing
- Drain-center location
- Underside mounting pads, clips, or brackets
- Any label indicating a wall side or rear side
Do not assume two similar-looking sinks install the same way. A rectangular undermount basin may be symmetrical in overall size but have a drain, overflow passage, or mounting points that establish a clear front and back.
If the sink came with no usable paperwork, contact the manufacturer or retailer with the model number and photos. Ask for the installation drawing rather than a general product photo.
Check the Overflow First, but Do Not Treat It as the Only Clue
The bathroom sink overflow orientation often provides a strong hint. On many bathroom sinks, the overflow opening is located toward the faucet or wall side of the basin. It is intended to connect with the sink’s internal overflow passage and allow excess water to move toward the drain.
However, this is not a universal rule. Some sink designs place the overflow in a less expected position, while others have no overflow at all. Vessel sinks commonly lack one, and certain decorative or specialty basins may be intentionally asymmetric.
What matters is whether the overflow location matches the manufacturer’s design and whether the drain assembly is compatible with it. A sink with an overflow generally needs a drain made for a sink with an overflow. A drain intended for a non-overflow sink is not automatically interchangeable.
If the sink has an overflow but the installed drain is not specified for that type of sink, pause before using the basin. Have the installer or a qualified plumbing professional verify that the drain assembly is appropriate and that the sink drains correctly.
Look at the Faucet-Hole Layout
A faucet-hole layout is one of the clearest orientation markers on a drop-in, pedestal, wall-mount, or self-rimming sink.
Sinks with factory-drilled holes
If the sink has one, three, or widespread faucet holes, those holes normally identify the rear of the sink. They should align with the faucet position shown in the installation instructions. A center faucet hole should be centered behind the drain unless the sink is specifically designed for an offset faucet.
A sink may look reversed when the faucet is mounted in a countertop rather than through the sink itself. In that case, confirm that the faucet lands over the usable part of the bowl and that the sink’s intended rear edge faces the wall.
Undermount sinks without faucet holes
An undermount sink often has no built-in faucet holes because the countertop carries the faucet. That makes orientation less obvious from above. Check the overflow, drain position, underside mounting points, and the cutout template instead.
Source: oatey
Is the Sink Drain Closer to the Front or Back?
A sink drain closer to front or back is not, by itself, proof that the sink is installed incorrectly.
Many bathroom sinks have a drain set toward the rear. This can leave a larger open area at the front of the bowl and may also position the drain plumbing closer to the wall, leaving more usable cabinet space below. Other designs place the drain closer to center, while a few are intentionally offset to one side.
Compare the drain to the faucet and bowl shape:
- A rear-set drain may be correct when it is shown that way in the product diagram.
- A centered drain may still sit slightly behind the bowl’s visual center.
- An offset drain may be intentional on a sink designed for a side faucet or an asymmetric basin.
- A drain that sits on the opposite side from the installation drawing suggests the sink may need to be turned.
The drain should also line up reasonably with the existing drain pipe and P-trap. A plumber can sometimes adapt plumbing for a different location, but a major mismatch may be a sign that the wrong sink was selected or that its orientation was not confirmed before installation.
Read the Bowl Shape From the User’s Side
Stand in front of the vanity and examine the bowl rather than focusing only on the rim. Many sinks are shaped to make their intended front clear.
Common design cues include:
- A deeper or more vertical wall at the back near the faucet
- A gently sloped front wall for comfortable handwashing
- A flat rear deck designed to sit below a faucet
- A wider front rim or apron-like edge
- An off-center bowl intended to leave counter space on one side
A sink can feel visually backwards if its broadest flat area is near the wall or if the drain is farther back than expected. That may be the correct layout. The useful question is not whether the bowl looks symmetrical, but whether its shape matches the product drawing and works with the faucet and countertop opening.
Does the Bathroom Sink Logo Show the Front?
A bathroom sink logo orientation can help, but it is not reliable enough to settle the question alone.
Manufacturers may place a logo where it is visible from the user’s side, near an overflow, or on a decorative face. On some sinks, the mark is subtle, absent, or placed where it is not visible after installation. On an undermount sink, an underside stamp may identify the model but not necessarily the front.
Treat the logo as a supporting clue. If the logo appears upside down or faces the wall, compare the sink against the installation diagram before deciding it is wrong.
Check the Underside Before Assuming the Sink Can Be Rotated
A sink that appears reversible from above may not be reversible underneath. This is especially important for undermount installations.
Look for:
- Factory-installed mounting pads or clip locations
- A reinforced edge intended to sit at the rear
- An overflow channel leading to the drain
- Labels or arrows on the underside
- A cutout template with a marked faucet side
The countertop cutout may also limit what can be changed. If the sink is turned after the countertop opening, faucet holes, or stone supports are completed, the reveal around the rim may become uneven. A reversed sink can also create conflicts with the faucet shank, supply lines, pop-up rod, or drain pipe.
Do not try to twist, pry, or detach an undermount sink yourself if it is already bonded or mechanically secured to the countertop. Undermount sinks rely on an installation system chosen for the sink and countertop material. Removal can damage the countertop, sink, or finished edges.
When an Unusual Orientation Is Probably Correct
The installation may be correct if all of the following are true:
- The manufacturer’s drawing matches the installed direction.
- The overflow is located where the model documentation shows it.
- The faucet reaches the bowl properly without aiming at the rim or backsplash.
- The drain assembly is compatible with the presence or absence of an overflow.
- The drain, stopper, and P-trap operate without leaks or binding.
- The sink sits evenly in the countertop opening with a consistent finished reveal.
In that situation, a rear drain, a surprising bowl slope, or an unfamiliar-looking flat area is likely a product-design choice rather than an installation error.
Signs the Sink Should Be Inspected Before Work Continues
Ask the installer to stop and verify the setup if you notice any of these problems:
- The overflow is on a different side than shown in the product diagram.
- Factory faucet holes face the wall, side wall, or user when they should be at the rear.
- The faucet does not center over the bowl as shown in the specification sheet.
- The drain location is opposite the drawing for the model.
- Mounting clips, brackets, or underside pads do not align naturally.
- The sink cannot be connected to the specified drain assembly.
- The countertop cutout exposes an uneven rim or leaves an unsuitable gap.
Take clear photos from above, below the vanity, and straight on from the front. Include the faucet, overflow, drain, and any model label. These photos make it easier for the installer, seller, or manufacturer to identify whether the issue is orientation, an incorrect model, a countertop-cutout problem, or a plumbing compatibility issue.
What to Do Before Caulk and Final Plumbing
If you suspect a bathroom sink installed backwards, act before the installation is finalized:
- Find the exact model number and installation instructions.
- Compare the installed sink with the manufacturer’s top and underside views.
- Confirm the faucet side, overflow position, and drain location.
- Check that the drain is made for a sink with or without an overflow, as applicable.
- Ask the installer to inspect the sink before permanent caulk, adhesive curing, or final drain connections.
If the sink is already fully installed and you are unsure, avoid dismantling the drain or sink mount solely to test the orientation. A contractor or qualified plumbing professional can evaluate the installation while protecting the countertop, faucet, and drain connections.
The Bottom Line
A bathroom sink is not necessarily installed backwards because the drain sits near the back, the bowl slopes in an unexpected direction, or the logo is hard to see. The correct orientation is the one specified for that exact model and supported by the overflow, faucet layout, mounting system, and countertop cutout.
When those details disagree, address it promptly. It is much easier to confirm or reverse a sink before the surrounding countertop work, sealant, and plumbing are treated as finished.
References
- Sinkology Bath Sink Drain Installation. (n.d.). https://www.sinkology.com/installation/bath-drains
- Bathroom Undermount Sink Installation Guide - Sinkology. (n.d.). https://www.sinkology.com/installation/bath-undermount-sinks
- Aspirations | Undercounter Sink Installation Guide - YouTube. (n.d.). https://www.youtube.com/watch?v=u3WRDKEPzu8
- Guide To Install Undermount Sinks: A Guide for Home Renovators. (n.d.). https://www.ruvati.com/guide-to-install-undermount-sinks
- Kohler K-2355-NY 1-Bowl Undermount Bathroom Sink User Manual. (n.d.). https://eu.manuals.plus/asin/B0051XJZQQ
- undermount sink installed correctly? | Houzz Forum. (n.d.). https://www.houzz.com/discussions/2515297/undermount-sink-installed-correctly
- How to install a bathroom sink with DIY guides. (n.d.). https://www.facebook.com/groups/971068814531343/posts/1303427207962167
- How to Install a Bathroom Sink Drain. (n.d.). https://www.instructables.com/How-to-Install-a-Bathroom-Sink-Drain