How to Install a Towel Bar on Tile Without Cracking It
Installing a towel bar on tile is mainly a matter of using the correct drill bit, drilling without impact mode, and choosing anchors for the wall material behind the tile. Mark the brackets carefully, protect the surface with painter’s tape, drill slowly and straight, then secure the mounting plates before attaching the bar.
The tile is only the finished surface. A strong installation depends on what is behind it—such as drywall, cement board, or a wood stud—and on using anchors or screws that match that backing. Here is how to install a towel bar on tile without unnecessarily risking cracks or a loose fitting.
Before you drill
Check the towel bar’s instructions first. Mounting plates and fasteners vary, and the manufacturer may specify a hole diameter, anchor type, or screw length. If the supplied hardware is intended for a different wall surface, replace it with hardware suited to your wall.
Also consider the location:
- Make sure the bar will not interfere with a shower door, cabinet door, vanity, or light switch.
- Leave enough room to lift towels on and off the bar without hitting nearby fixtures.
- Avoid drilling very close to a tile edge, corner, or existing hole, where the tile can be more vulnerable.
- If the bar will be inside a shower or directly in a frequently wet area, think carefully about waterproofing before drilling. A hole through the finished tile can create a water-management problem if it is not sealed appropriately.
Do not drill until you have a reasonable way to identify what is behind the tile. Avoid suspected plumbing and electrical routes. If the location is near a shower valve, water supply, drain, outlet, or switch and you cannot verify the wall construction, choose another position or consult a qualified professional.
Tools and materials
You will usually need:
- The towel bar, mounting plates, brackets, and any supplied template
- A level and tape measure
- Pencil or a fine marker
- Painter’s or masking tape
- A variable-speed drill
- A carbide-tipped or diamond-tipped bit rated for tile
- Wall anchors and screws matched to the backing behind the tile
- A screwdriver or driver bit
- The correct Allen key if the bar uses set screws
- Eye protection
A standard twist bit is not the best choice for ceramic or porcelain tile. Use a bit designed for tile, and follow the bit and towel-bar instructions for the required hole size. Porcelain is particularly hard, so a diamond-tipped bit may be appropriate. Do not use the drill’s hammer or impact setting while passing through the tile.
How to install a towel bar on tile
1. Plan the bar position
Hold the assembled towel bar or its template against the wall and decide where the brackets should sit. Use a level to check the bar’s intended position, then mark a light centerline or the bracket locations.
Measure the distance between the mounting plates if the product does not include a template. Check this measurement twice before transferring it to the wall. A small error can leave the brackets misaligned even if the bar itself looks level.
If one or both bracket positions line up with a wood stud or other solid framing, use screws long enough to pass through the tile and wall finish and engage that framing as directed by the product instructions. A stud is generally a different fixing situation from a hollow wall: do not add a hollow-wall anchor where a suitable structural fixing is available.
2. Mark the drilling points
Place each mounting plate or template over the marks and verify the spacing and level again. Mark the center of every hole. Keep the marks away from tile edges and, where possible, away from grout joints.
Some products use one hole per plate, while others use two or more. Mark all required holes rather than assuming the brackets will hide small errors.
3. Apply tape over the marks
Cover each drilling point with a small piece of painter’s or masking tape. Mark the hole again on top of the tape. The tape gives the bit a little more initial grip and makes the mark easier to see. It is a precaution, not a substitute for slow drilling and light pressure.
Source: angiesroost
4. Drill through the tile slowly
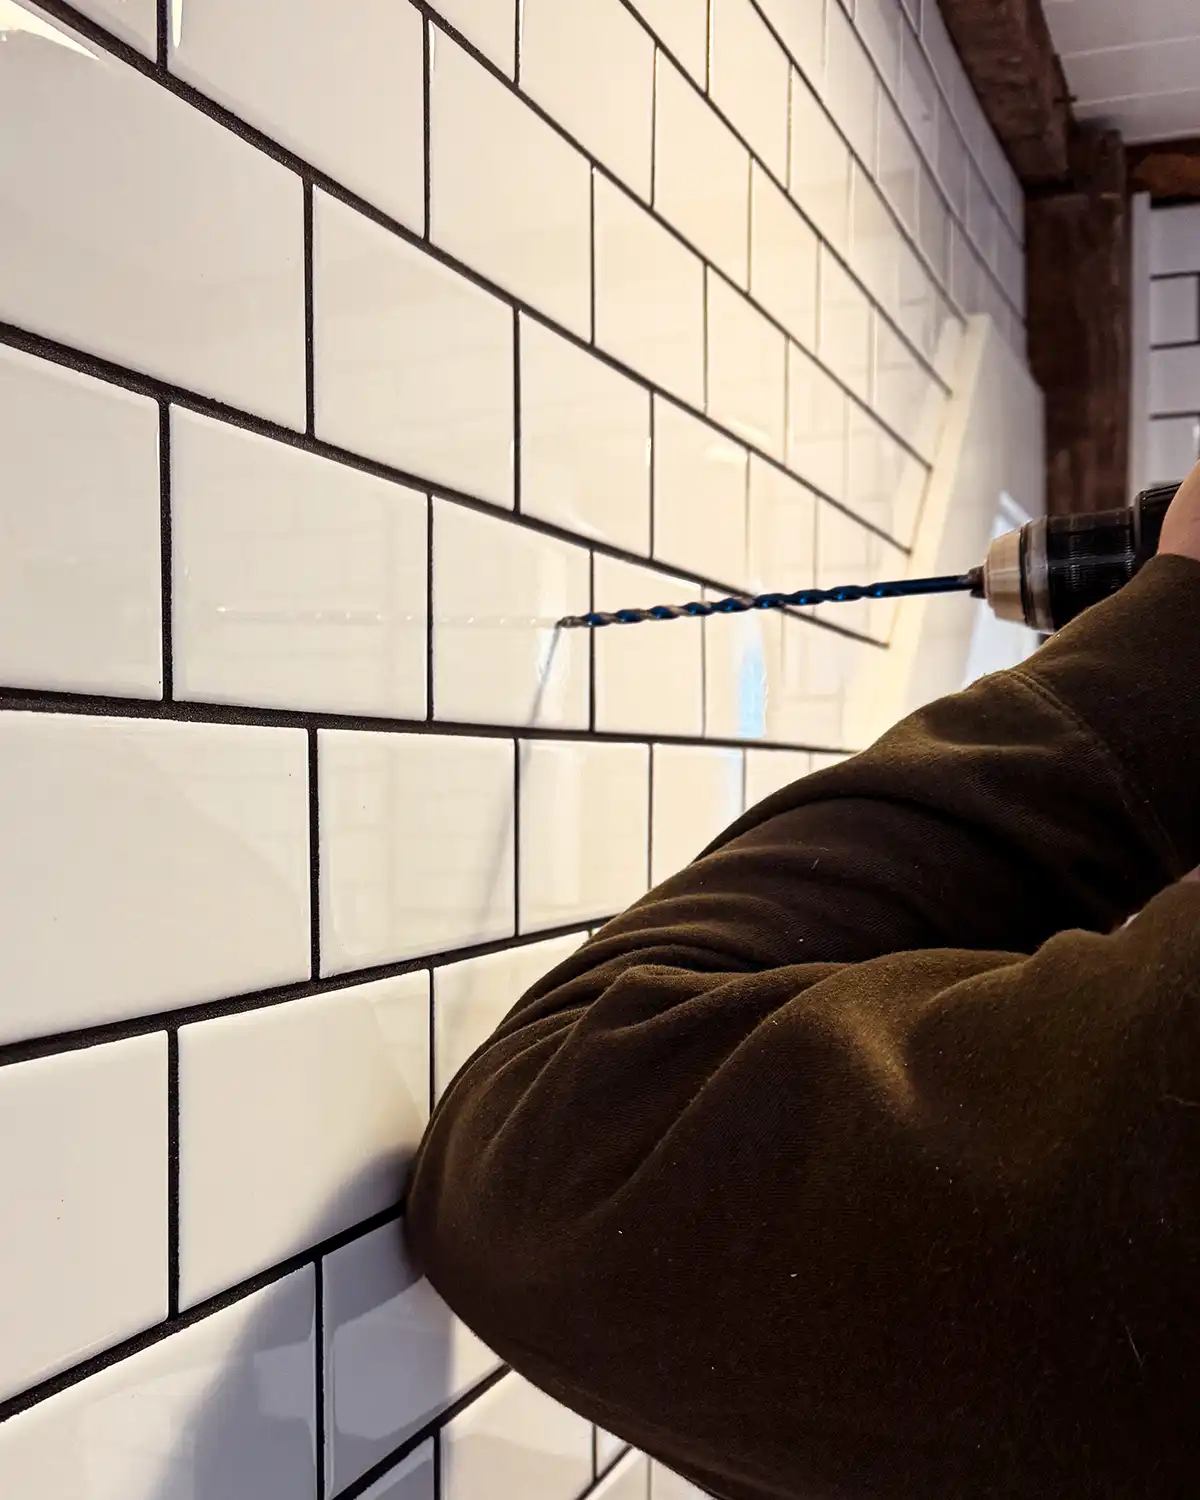
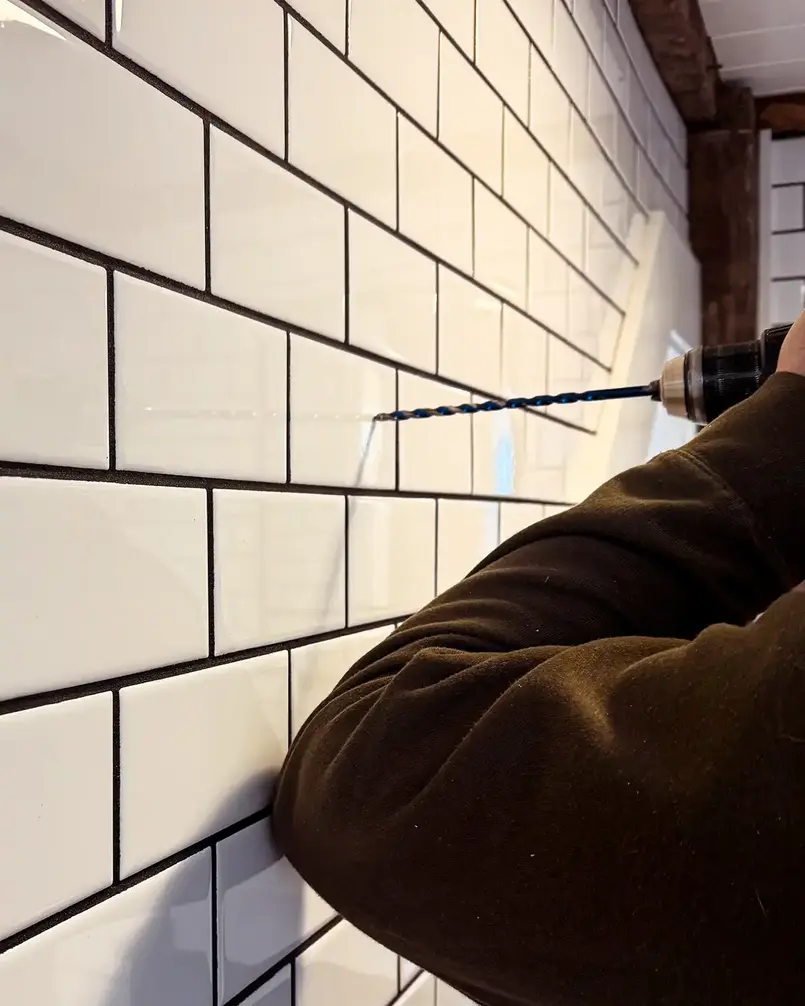
Fit the tile-rated bit and set the drill to a slow speed. Hold the drill straight against the wall and begin with light pressure. Let the bit cut rather than forcing it.
Keep the drill steady while it passes through the glazed surface. Once the bit has gone through the tile, continue only as far as needed for the specified anchor or screw. The material behind the tile may require a different drilling method or bit, so follow the anchor instructions after the tile layer has been penetrated.
Do not use hammer mode or an impact driver on the tile. Excess vibration can damage the tile or surrounding grout. If the bit becomes hot, pause and follow the bit manufacturer’s guidance for cooling. Do not improvise with water near an electric drill unless the tool and method are specifically suitable for that use.
Stop if the tile flexes, cracks, or begins to chip noticeably. A damaged tile may need to be replaced before the bar can be mounted reliably.
5. Install the correct wall anchors
The anchor must match the wall behind the tile, not just the tile surface. Common situations include:
- Wood stud or solid framing: Use an appropriate screw into the framing. The screw must be long enough to pass through the finished wall and reach the solid material.
- Drywall or another hollow wall: Use anchors designed for that wall type and for the expected load. The anchor must fit through the drilled opening and seat as instructed.
- Masonry or cement-based backing: Use fasteners intended for that material.
Do not assume the anchors included with the towel bar are suitable for every tiled wall. Check the package instructions for the required hole size and installation method. Some anchors must sit flush with the wall surface; others expand or grip behind the wall. Do not drive an anchor farther than its instructions allow, because excessive force can damage the tile.
6. Attach and level the mounting plates
Position each mounting plate over its holes. Start all screws by hand, keeping the plates loose enough to make small adjustments. Check the plates with a level before tightening them fully.
Tighten the screws until the plates are held firmly. Avoid overtightening. Excessive force can crack the tile, deform a plate, strip an anchor, or pull a hollow-wall anchor out of position.
If the bar uses separate decorative posts, install them over the plates according to the product instructions. Set screws are often located underneath or on the side of the posts; tighten them with the correct Allen key, but do not force them.
7. Attach the bar and test it gradually
Place the towel bar between or onto the mounted posts and secure it as directed. Confirm that it is level and that both ends are fully seated.
Test the installation with light hand pressure at each bracket. The bar should not rock, slide, or pull away from the wall. If it moves, remove the bar and find the cause rather than simply tightening harder. The problem may be a loose screw, an unsuitable anchor, an oversized hole, or a mounting plate that is not seated flat.
Add a towel and check the bar again during normal use. Damp towels place more strain on a fitting than an empty bar, so a bar that feels loose should be corrected before it is used regularly.
How to avoid cracking tile
The main precautions are simple:
- Use a tile-rated carbide or diamond bit.
- Mark accurately and support the drill straight against the wall.
- Start slowly with light pressure.
- Keep the drill out of hammer or impact mode.
- Avoid tile edges, corners, and existing holes.
- Use the correct bit and method for the wall material after the bit passes through the tile.
- Do not overtighten screws or anchors.
If the tile is already cracked, hollow-sounding, loose, or poorly supported, do not treat it as a normal drilling surface. Repairing or replacing the tile first may be necessary for a secure result.
Alternatives when you cannot drill
A suction, adhesive, or tension-mounted towel holder can work for some bathrooms and rental situations, but these options are not equivalent to a mechanically anchored bar. Check the product’s stated surface requirements and weight limitations, and use only on a clean, sound, compatible surface.
Adhesive mounts are less suitable for textured tile, dusty grout, damp surfaces, or locations where the bar will be pulled frequently. They may also fail when a heavy wet towel is added. A freestanding towel rack, over-the-door towel holder, or a bar mounted to an existing cabinet can avoid drilling altogether.
For a rental, check the lease before drilling or using adhesive products. If the wall is inside a shower or the tile may conceal plumbing or electrical wiring, avoid choosing a no-drill product solely to bypass a location problem; select a safer location instead.
When to stop and get help
Pause the project if you cannot determine the wall material, suspect a pipe or wire behind the proposed hole, find damaged or loose tile, or need to drill into a wet-area wall where waterproofing is uncertain. The key distinction is that drilling the tile creates the opening, but the anchor or screw must safely engage the structure behind it. A neat-looking bar is not secure unless both parts of that installation are handled correctly.
References
- How to Replace Towel Racks on Different Wall Materials. (n.d.). https://www.mrhandyman.com/blog/how-to-install-a-towel-rack-on-different-wall-ma
- INSTALLATION INSTRUCTIONS. (n.d.). https://lixil.cdn.celum.cloud/141094_D35100240_DXV_Rem_TowelBar_EN_0_original.pdf
- Bathroom Towel Bar Installation: Permanently Anchor a Towel Bar. (n.d.). https://www.familyhandyman.com/project/how-to-replace-a-towel-bar
- Installing Towel Bar - Grout Mount Type. (n.d.). https://www.homemadetools.net/forum/installing-towel-bar-grout-mount-type-71886
- Bathroom Towel Bar Installation: Permanently Anchor a Towel Bar. (n.d.). https://www.familyhandyman.com/project/how-to-permanently-anchor-a-bathroom-towel-bar
- How To Replace a Towel Bar With Fixed Ceramic Ends. (n.d.). https://www.drivenbydecor.com/replace-towel-bar-mounted-ceramic-tile
- Install a towel bar on a porcelain tile wall.. (n.d.). https://www.youtube.com/watch?v=uT04q4IkgYU
- How to Repair a Ceramic Towel Bar and Replace the Rod – Flooring Supply Shop. (n.d.). https://flooringsupplyshop.com/blogs/default/how-to-repair-towel-bar