How to Paint Tile Floors: Patterns, Care, and Finish Options
Painting can refresh dated ceramic or porcelain flooring without immediately replacing it, but success depends on realistic expectations. Learning how to paint tile floors means understanding that preparation, compatible coatings, careful application, and ongoing maintenance all matter. It is also important to distinguish a lightly used bathroom floor from tile inside a shower, where constant moisture can shorten the life of a painted finish.
Alternative Options to Painting Tile Floors
Before buying paint, consider whether coating the existing tile is the right solution. Painted floors can look attractive when the surface is properly prepared, but paint does not reproduce the depth, texture, or durability of a factory-fired tile finish. Some homeowners also find that an imperfectly applied coating looks rough or noticeably painted.
Non-paint options include:
- Deep-cleaning the tile and grout: Removing accumulated residue may restore more of the original appearance than expected.
- Refreshing or recoloring the grout: Changing stained or dated grout can alter the look of the entire floor while leaving the tile intact.
- Replacing damaged or unattractive tile: Replacement requires more work, but it provides a new finished surface rather than a coating over the old one.
- Installing a compatible floor covering: In appropriate rooms, another flooring material may be installed after confirming that the existing surface and floor height are suitable.
- Using removable decorative elements: A rug or mat can introduce color and pattern in dry areas without permanently changing the tile.
Painting may be unsuitable when the tile remains wet for long periods, has widespread damage, or cannot be cleaned well enough for reliable adhesion. It is especially risky inside a shower. Repeated water exposure can contribute to peeling, deterioration, and an uneven appearance, even when the initial result looks good.
Adhesion problems are another reason to consider alternatives. A coating can only bond as well as the layers beneath it. If the floor has an unstable skim coat, residue, loose repairs, or an incompatible previous finish, new paint may fail along with the underlying material.
Preparing Tile Floors Before Painting
Preparation has a direct effect on adhesion and appearance. Paint does not hide grease, cracked grout, loose material, or surface texture. In some cases, it makes those defects more visible. Set aside enough time to clean, repair, sand, prime, and dry the floor rather than treating preparation as a quick preliminary task.
A practical preparation sequence is:
Clear the room. Remove rugs, movable furniture, baskets, and other objects. You need access to the entire floor, including corners and edges.
Clean the tile thoroughly. Remove dirt, grease, soap residue, and cleaning-product buildup. Pay particular attention to bathroom floors, where residue may remain even when the tile looks clean. Rinse away cleaner as directed and let the floor dry completely.
Inspect the tile and grout. Look for cracks, chips, loose tile, missing grout, and failing previous coatings. Repair suitable defects with materials compatible with the floor and the planned paint system. Painting over unstable material will not make it sound.
Sand the surface. Tile is often smooth, which makes it difficult for a coating to grip. Sanding reduces gloss and creates a more receptive surface. Work evenly rather than aggressively, and follow any preparation instructions supplied by the primer or paint manufacturer.
Remove sanding dust. Vacuum or wipe away all residue. Dust left on the floor can become trapped in the finish and interfere with adhesion.
Apply a bonding primer. Use a primer labeled for slick or difficult surfaces and confirmed as compatible with both the tile and topcoat. Skipping this step is a common cause of poor adhesion. Apply the primer evenly, including along grout lines, and allow it to dry for the specified period.
Protect nearby surfaces. Mask baseboards, walls, cabinets, toilets, tubs, shower curbs, and transitions to other flooring. Cover anything that could be hit by splatter or roller spray. Press masking tape down carefully so paint does not creep beneath the edge.
Plan your route before starting. Work from the area farthest from the exit toward the doorway so that you do not have to step on freshly primed or painted tile.
Preparation improves the chance of a satisfactory finish, but it does not guarantee permanent results. Tile floors experience foot traffic, cleaning, and moisture, so even a well-prepared coating may eventually show wear.
Selecting Paint That Bonds to Tile
Standard interior wall paint is a poor choice for tile floors. It is intended for walls rather than slick surfaces exposed to shoes, spills, and repeated cleaning. It may mark, peel, or wear away quickly when used underfoot.
Choose a coating specifically labeled for tile or for floors made from the type of tile you have. The product directions should identify:
- Which surfaces the paint can cover
- Whether sanding is required
- Which primer is compatible
- Whether a separate protective sealer is needed
- Where the coating can and cannot be used
- How long each layer must dry or cure
Some floor-coating systems include multiple coordinated components. If using such a system, avoid mixing unrelated primer, paint, and sealer products unless their manufacturers confirm compatibility. A durable top layer cannot compensate for a primer that fails to bond to the tile.
The bonding primer is particularly important. It creates an intermediate layer between the smooth tile and the decorative paint. Applying floor paint directly to unprimed tile may produce an acceptable appearance at first, yet adhesion problems can become evident after cleaning or regular use.
Color and finish also influence the final result. A single color creates a simpler surface, while a contrasting stencil can imitate the visual rhythm of patterned tile. Remember that paint covers both the tile and grout unless you deliberately mask individual areas. The finished floor will therefore have a more uniform coated appearance than unpainted tile.
For shower decor projects, check the permitted use carefully. A product suitable for a bathroom floor is not automatically suitable for the floor inside a shower. Persistent moisture and direct water exposure make the latter a much more demanding environment.
Applying Paint to Tile Floors Step by Step
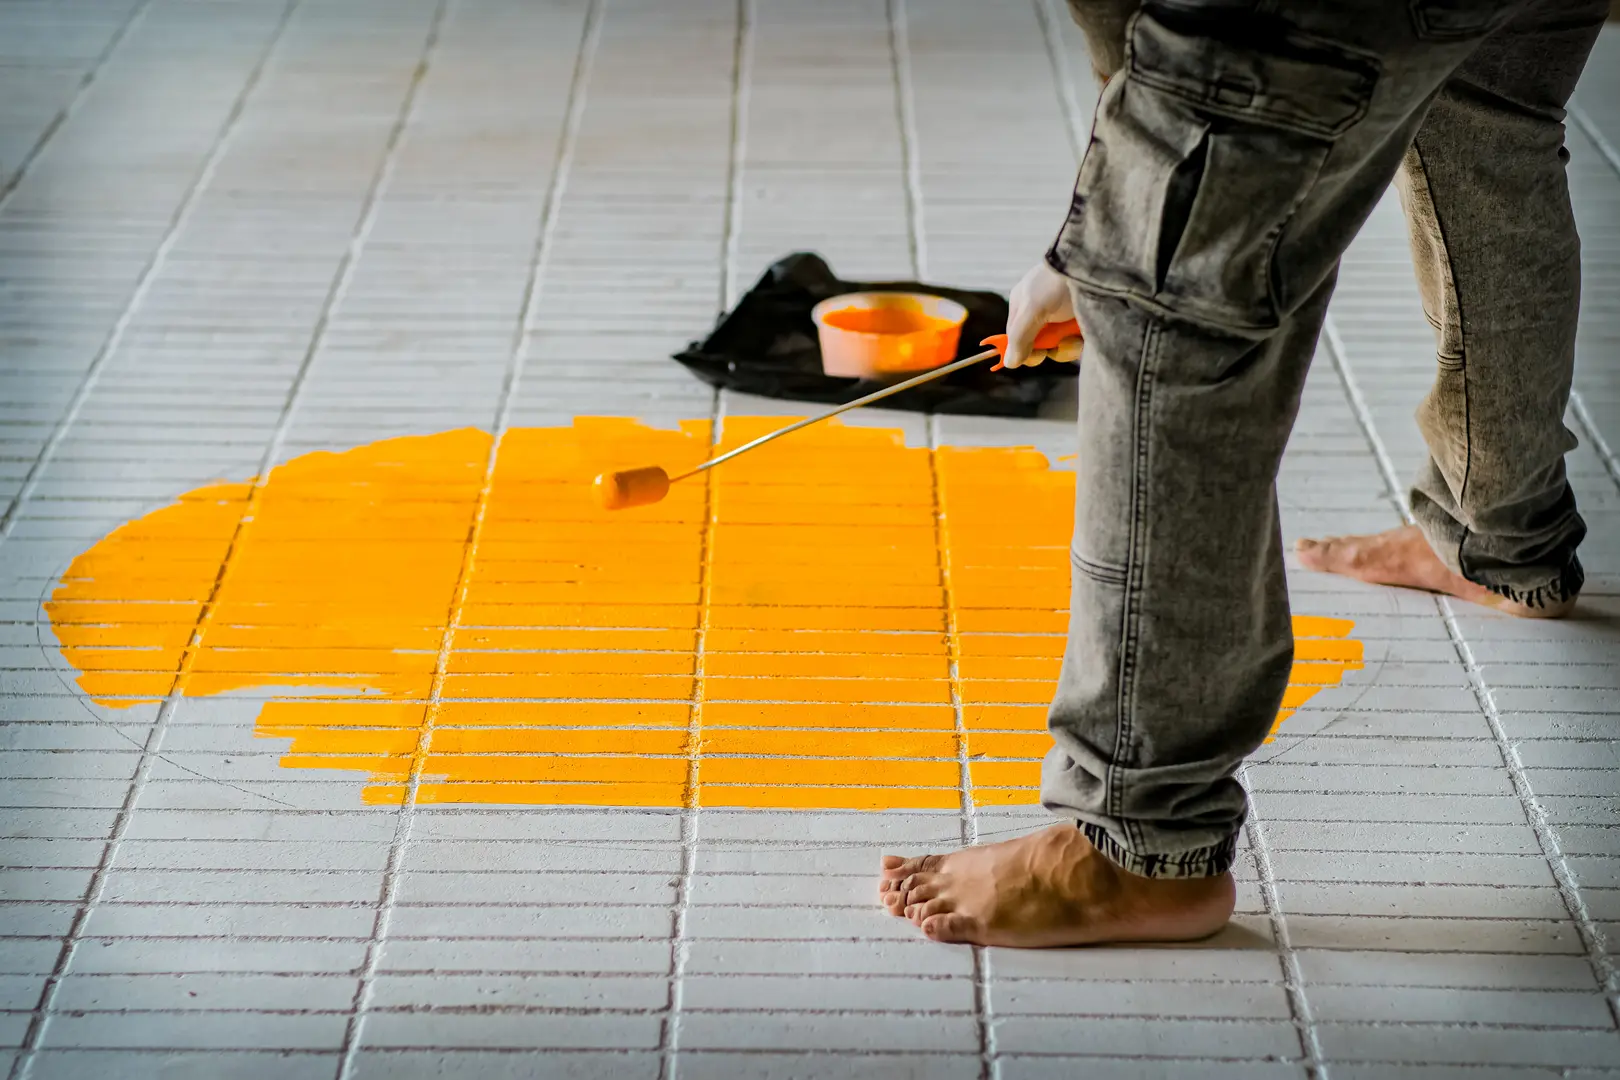
Once the tile is clean, repaired, sanded, and primed, apply the color in a controlled sequence. Several thin coats generally produce a smoother and more reliable finish than one heavy coat.
Review the product instructions. Confirm application methods, ventilation guidance, drying periods, recoat timing, and sealer compatibility before opening the paint.
Check the prepared floor. Make sure the primer is dry and the surface is free from hair, dust, and other debris. Correct imperfections now rather than sealing them beneath additional layers.
Cut in around the perimeter. Use a suitable brush to paint edges, corners, grout lines near walls, and areas a roller cannot reach. Avoid leaving thick ridges where brushed and rolled sections meet.
Apply the first thin coat. Spread the paint evenly across a manageable area. Do not load the surface with paint in an attempt to achieve full coverage immediately. Heavy layers can dry unevenly and produce a rough result.
Let the coat dry as directed. Do not judge dryness only by touch. Follow the stated recoat time, because the material underneath may still be soft even when the surface no longer feels wet.
Add additional thin coats. Repeat the process until coverage is even. Inspect the floor between layers for roller marks, debris, missed grout lines, or areas with excessive buildup.
Apply the stencil pattern, if desired. Wait until the base color has dried for the required time. Use light applications so patterned areas do not develop raised, heavy edges.
Protect the paint with a compatible water-based sealer. Once the decorative layers are ready for sealing, apply a clear water-based sealer approved for the paint and intended use. Follow the directions regarding coat count and application.
Keep traffic off the floor. Allow the completed system to dry and cure for the full recommended period. Premature foot traffic, furniture placement, or cleaning can mark a finish that looks dry but has not fully hardened.
Maintain a wet edge while painting, but do not repeatedly roll over areas that have already begun to set. Excessive reworking can disturb the finish and create visible texture.
Be conservative about painting shower floors or other locations exposed to frequent standing water. A sealer adds protection, but it does not make every painted tile system appropriate for constant moisture. In high-moisture shower areas, the finish may deteriorate much faster than it would on a dry bathroom floor.
Creating a Tile Floor Pattern with a Stencil
A stencil can turn a plain painted floor into a repeating geometric, floral, or tile-inspired design. The technique is accessible, but accuracy matters because small alignment errors can become noticeable across a large floor.
Choose a stencil made from material durable enough for repeated use. A thin, fragile stencil may bend, tear, or lose its shape as it is repositioned. The design should also fit the existing tile dimensions or the scale of the room.
Before painting the pattern:
- Test the color combination and technique on a separate surface if possible.
- Determine the starting point and pattern direction.
- Use existing grout lines as alignment guides when appropriate.
- Make reference marks that can be removed or covered.
- Confirm that the base coat is dry enough to accept tape and stencil paint.
Secure the stencil so it cannot slide while paint is being applied. Use a method that holds it flat without damaging the base coat. Pay close attention to corners and narrow cutouts, which can lift and allow paint to spread beneath the stencil.
Apply a small amount of paint rather than saturating the tool. Excess paint increases the chance of bleeding under the stencil and can leave thick pattern edges. Build the color gradually if stronger coverage is needed.
Lift the stencil carefully, then reposition it using its registration marks or the existing pattern. Periodically remove paint buildup from the stencil according to the material’s care requirements. Dried buildup can distort the edges and reduce the crispness of later repeats.
Near walls, fixtures, and irregular edges, the stencil may need to bend slightly or cover only part of the design. Work slowly in these areas. Allow the completed pattern to dry for the paint manufacturer’s recommended time before applying sealer.
Maintaining Painted Tile Floors
A high-quality, compatible sealant is the main protective layer over a painted tile floor. It helps shield the decorative coating from everyday cleaning and wear, but it does not make the floor maintenance-free.
Use these habits to preserve the finish:
- Sweep or vacuum regularly. Removing grit prevents loose particles from being dragged across the painted surface.
- Clean spills promptly. Do not allow residue to sit unnecessarily on the coating.
- Use gentle cleaning methods. Choose cleaners and tools approved for the sealed finish.
- Avoid abrasive products. Scouring powders, rough pads, and aggressive scrubbing can dull, scratch, or wear through the sealer and paint.
- Watch high-traffic areas. Inspect entrances, paths, and areas around fixtures for early signs of wear.
- Limit prolonged moisture exposure. Wipe up standing water where practical, particularly on painted bathroom floors outside the shower.
Do not assume that any clear coating can be used for maintenance. If the floor eventually needs another protective coat, verify that the new sealant is compatible with the existing finish. Clean and prepare the surface according to the relevant directions before resealing.
Painted tile may also require occasional touch-ups. A small damaged area should be cleaned and repaired with compatible materials rather than covered with an unrelated paint. Keep a record of the primer, paint, stencil color, and sealer used so the system can be matched later.
Final Thoughts
The most important lesson in how to paint tile floors is that the visible color is only one part of the project. Thorough cleaning, even sanding, sound repairs, bonding primer, thin paint coats, and a compatible water-based sealer all contribute to the result.
Follow the directions for every product in the system, especially restrictions on surfaces and moisture exposure. Allow primer, paint, pattern layers, and sealer to dry for their full recommended times. Rushing between stages may undermine otherwise careful work.
Finally, be realistic about location. Painting can be a practical decorative update for a suitable tile floor, but surfaces exposed to heavy wear or constant shower moisture may be better candidates for a non-paint solution.