How to Turn a Dresser Into a Bathroom Vanity
A dresser can become a bathroom vanity if it is sturdy enough for a countertop and sink, fits the available space, and can be modified around the drain and water lines. The key is to plan the sink, plumbing, drawer clearance, wall attachment, and moisture protection before cutting the furniture.
This is not simply a matter of placing a basin on top. You may need to alter the back, remove or shorten drawers, reinforce the cabinet, make a sink cutout, seal exposed wood, and connect the supply and drain lines. Countertop fabrication and plumbing may be better handled by a qualified professional, especially when the existing connections do not line up cleanly.
Choose a dresser that can work as a vanity
Start with the room and plumbing, not the furniture’s appearance. Measure the available wall, the location of the existing drain and supply lines, and the clearance needed for doors, drawers, and people using the sink. Then compare those measurements with the dresser and the proposed countertop.
A suitable dresser should have:
- A solid, stable frame rather than a loose or badly damaged case
- A top that can support the countertop and sink assembly
- Enough depth for the selected sink and faucet arrangement
- A back or interior that can be modified without destroying the cabinet
- Drawers or doors that can be adapted around the plumbing
- A finished height that works with the countertop and sink you plan to use
Avoid furniture with soft, swollen, delaminated, or already water-damaged panels. Veneer, particleboard, and unfinished edges need particular care because exposed cut edges can absorb moisture.
Before buying a dresser, choose the sink and countertop style if possible. A vessel sink, drop-in sink, undermount sink, or integrated sink changes the required opening, top thickness, faucet position, and cabinet clearance. Do not cut the furniture based only on a sink’s outside dimensions; use the installation template or manufacturer’s specified cutout information.
Plan the layout before making any cuts
Make a simple layout of the dresser, countertop, sink, faucet, drain, and wall connections. Mark the centerline of the sink and compare it with the position of the existing plumbing. Also check where drawer boxes, drawer slides, stretchers, and internal supports sit.
The plumbing usually needs a clear path through the back of the cabinet. The drain assembly and P-trap also occupy space below the sink, so a drawer directly beneath the basin may need to be removed, shortened, or rebuilt as a shallow drawer front.
[[IMAGE:dresser-vanity-planning]]
A useful planning checklist is:
- Will the sink opening fit between the dresser’s side panels and internal supports?
- Can the drain reach the wall connection without forcing the trap into an awkward position?
- Will the water supply lines interfere with a drawer or shelf?
- Can the cabinet sit against the wall while leaving room for the existing connections?
- Will the countertop overhang remain supported around the sink opening?
- Can the dresser be fastened securely to wall framing or another suitable support point?
If the plumbing is not centered behind the dresser, do not assume it can simply be pushed aside. The final layout may require a different sink position, a plumbing adjustment, or a different piece of furniture.
Prepare and modify the dresser
Remove the drawers, hardware, and any parts that will make sanding or cutting difficult. Label the drawers and slides so you can return them to their original positions or identify which ones need modification.
If the dresser has an existing finish, prepare it according to the finish system you plan to use. Clean and sand as appropriate, but do not rely on paint alone to protect raw wood from repeated splashes. The inside, underside, cut edges, and back deserve attention as well as the visible front.
Make the plumbing opening
Mark the drain and supply-line openings from the actual wall locations rather than guessing. Make the holes only as large as needed for the connections and access you require. A smaller, controlled opening is easier to protect and less likely to weaken the cabinet.
If the back panel is structural, do not remove a large section without adding suitable support. Keep the side panels, top rails, bottom structure, and other load-bearing parts intact whenever possible. If a cut intersects a support or leaves a weak span, add a properly secured brace or have the cabinet evaluated before proceeding.
Deal with the drawers
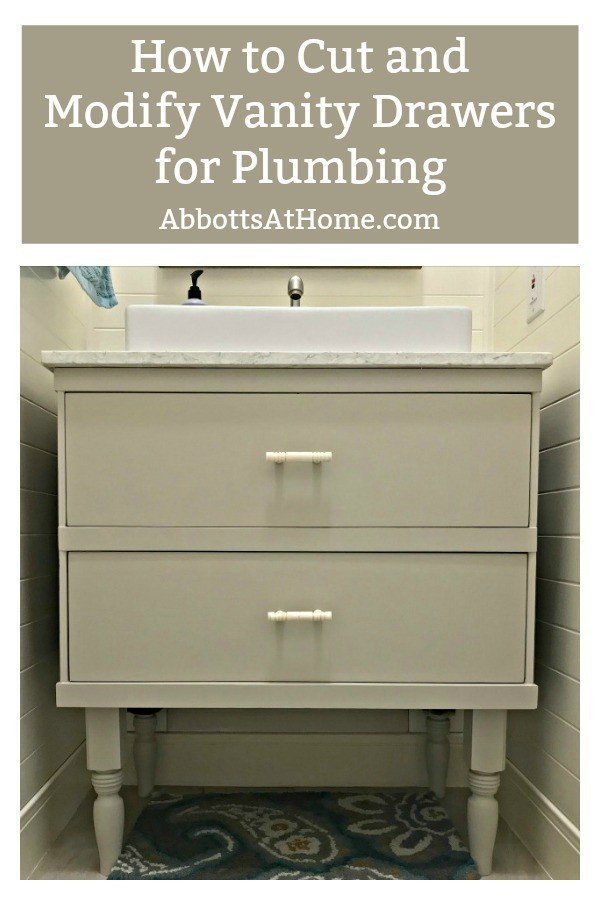
The top drawer is often the part most affected by the sink and drain. Possible approaches include removing the drawer box, shortening its back, building a U-shaped opening around the plumbing, or converting the drawer front into a fixed panel. Lower drawers may need smaller rear cutouts for supply lines or the drain.
Keep enough material around each cutout to preserve the drawer’s strength. Sand exposed edges smooth, then seal them. A drawer that looks usable before installation may become inaccessible once the drain and supply lines are connected, so test-fit the plumbing path before refinishing or permanently attaching parts.
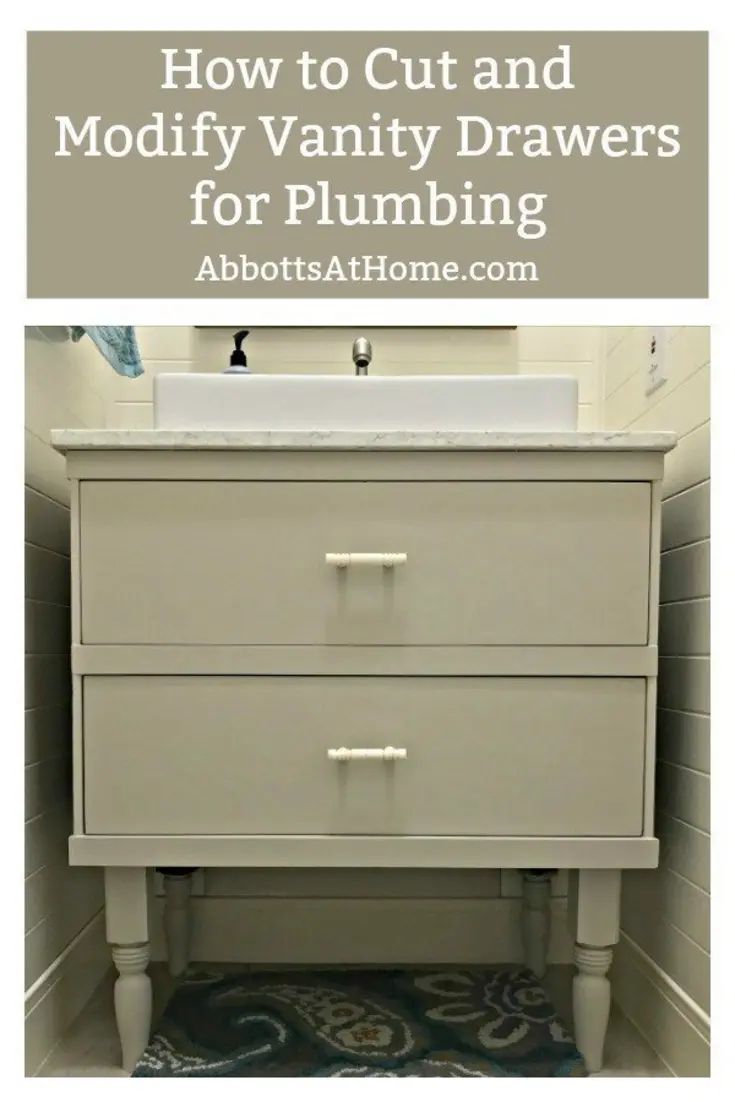
Source: abbottsathome
Install the countertop and sink
The countertop is often the most exacting part of a dresser vanity. A solid-surface, stone, porcelain, or other bathroom-suitable top can provide a more practical finished surface than using the dresser’s original top alone. The material, sink type, faucet holes, backsplash, and wall condition all affect the final layout.
For a sink cutout, follow the sink manufacturer’s template and installation instructions. Measure twice, mark the centerline clearly, and keep the opening away from supports that need to remain. If the top requires specialized cutting, polishing, drilling, or edge finishing, arrange that work before bringing the countertop into the bathroom.
A drop-in or vessel sink still needs a properly supported and sealed connection. Apply the sealant specified for the sink and countertop materials, and follow the sink’s installation method. Do not depend on a bead of sealant to compensate for a poorly sized opening or an unstable top.
The faucet may mount to the countertop, sink, or a wall depending on the design. Confirm the faucet hole location and the clearance behind the basin before cutting. Leave enough room to operate the handles and clean around the fixture.
Waterproof and seal the cabinet
Water protection is one of the most important differences between a dresser and a purpose-built vanity. Seal the top, underside, interior floor, back edges, drawer cutouts, and every newly exposed edge with a finish suitable for the material and bathroom use. Follow the coating manufacturer’s preparation and recoat instructions.
Pay special attention to areas where water may collect:
- Around the sink rim or mounting surface
- Along the countertop-to-wall joint
- Beneath the countertop overhang
- Around faucet penetrations
- Inside the cabinet below the drain
- At cut edges in plywood, veneer, or composite panels
Caulk is useful at appropriate joints, but it is not a substitute for sealing absorbent material or correcting a gap. Keep the cabinet dry while finishes cure, and inspect the seals periodically for cracking, lifting, or open joints.
Secure the vanity and connect the plumbing
A dresser vanity should be secured so it cannot shift when the countertop, sink, drawers, or plumbing are used. Locate suitable wall framing or use an appropriate anchoring method for the wall construction. Reinforce the inside of the dresser where fasteners pass through if the original cabinet does not provide a strong attachment point.
Set the cabinet in its final position, confirm that it is level and supported, and then install the countertop and sink according to their instructions. Connect the faucet supply lines and drain components without forcing them into alignment. A replacement P-trap or additional pipe may be needed, but the exact parts depend on the sink, wall connection, and existing plumbing.
If you must alter fixed water or drain piping, if the connections are inaccessible, or if the finished arrangement leaks, stop and contact a qualified plumber. Check local requirements through the appropriate building or plumbing authority before making changes to installed plumbing. A countertop fabricator may also be the right choice for sink and faucet openings that require specialized tools or precise finishing.
Test before loading the drawers
Run the faucet and inspect every connection, including the supply fittings, drain body, trap, and the area beneath the sink. Dry the joints first so new moisture is easy to identify. Look inside the cabinet and around the drawer modifications rather than checking only the visible floor.
Operate the drawers several times and confirm that none contacts the drain, supply lines, shutoff valves, or cabinet braces. Make sure the sink remains stable and that the countertop does not move under normal use. Keep the cabinet interior accessible enough to inspect and service the plumbing later.
Common mistakes to avoid
- Choosing the dresser before checking the sink and plumbing locations
- Cutting through structural rails or supports without reinforcement
- Assuming every drawer can remain full-depth
- Using the original furniture finish as the only moisture barrier
- Making sink or faucet openings without the correct installation template
- Sealing the cabinet before test-fitting the plumbing
- Hiding shutoff valves or traps behind permanently inaccessible panels
- Attaching the vanity only to drywall or relying on its weight to keep it still
- Treating caulk as a repair for swollen or weak wood
A dresser vanity works best when the furniture is treated as a cabinet that needs bathroom-specific adaptation. Select a sound dresser, plan around the actual sink and plumbing, preserve the structure, seal every exposed surface, and bring in skilled help for difficult countertop or plumbing work. That approach keeps the character of furniture while making the vanity practical to use and maintain.
References
- How to Turn a Vintage Dresser into a Bathroom Vanity - At Charlotte’s House. (n.d.). https://atcharlotteshouse.com/how-to-turn-a-vintage-dresser-into-a-bathroom-vanity
- Converting an Old Dresser Into a Bathroom Vanity. (n.d.). https://fivestarbathsolutions.com/converting-old-dresser-into-bathroom-vanity
- How to Turn a Dresser into a Vanity. (n.d.). https://www.maisondepax.com/how-to-turn-a-dresser-into-a-vanity
- How to Turn a Dresser Into a Bathroom Vanity. (n.d.). https://www.homedepot.com/c/ap/how-to-turn-a-dresser-into-a-bathroom-vanity/9ba683603be9fa5395fab9016b3b6585
- How to Convert an Antique Dresser into a Vanity. (n.d.). https://www.oliveandjunehome.com/blog/how-to-antique-dresser-turned-bathroom-vanity
- DRESSER into BATHROOM VANITY | Vessel Sink Vanity. (n.d.). https://www.youtube.com/watch?v=WDoBgeqadCY
- Transforming an old dresser into a bathroom vanity. (n.d.). https://www.kotona.com/articles/dresser-to-vanity
- Stop Bathroom Moisture From Rotting Your Vanity | Dreamwerks. (n.d.). https://dreamwerks.com/blogs/news/stop-bathroom-moisture-from-rotting-your-vanity-collections