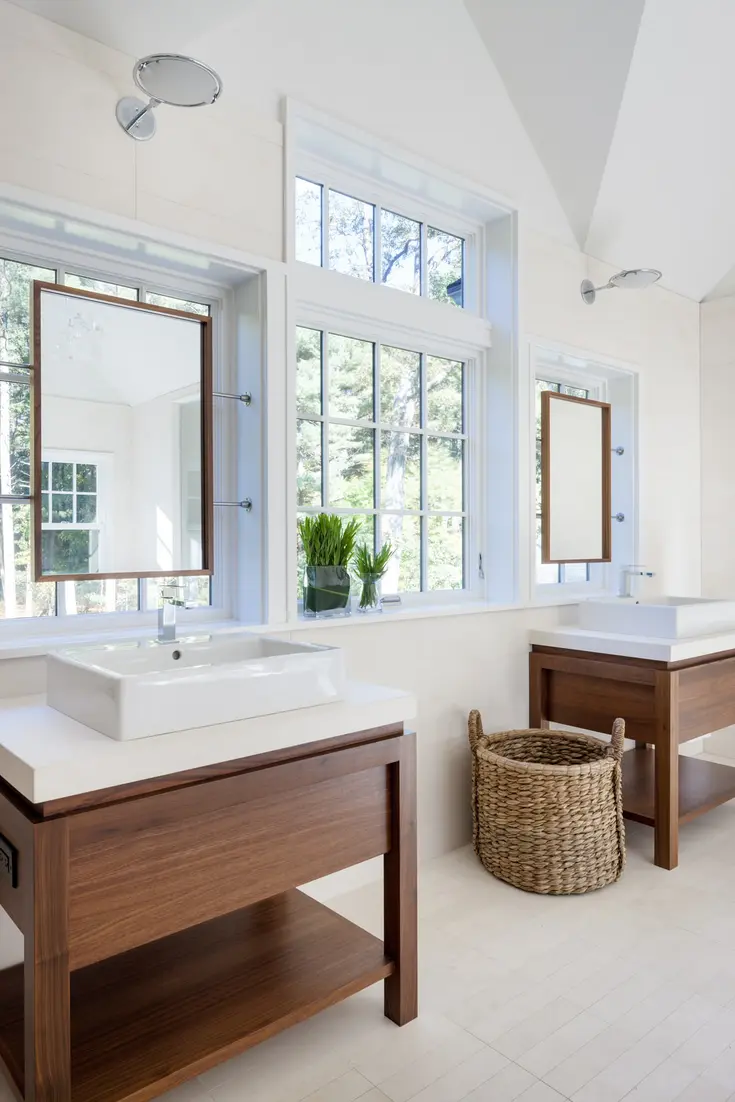
How to Measure for a Bathroom Mirror That Fits Perfectly
A bathroom mirror needs to do more than fill an empty wall. It should provide a useful reflection, relate naturally to the vanity, work with nearby lighting, and support the room’s overall scale. Learning how to measure for bathroom mirror placement helps avoid a mirror that looks undersized, overwhelms the vanity, or conflicts with fixtures and storage.
The process starts with basic dimensions, but a perfect fit also depends on eye level, shape, frame thickness, lighting, and the amount of open wall around the mirror.
Why Bathroom Mirror Dimensions Matter
A bathroom mirror functions as both a practical tool and an architectural feature. Its dimensions affect how you see yourself, but they also influence the bathroom’s perception as large, bright, balanced, or crowded.
A mirror that is too small may appear disconnected from the vanity and provide an incomplete reflection, especially in a shared bathroom. Conversely, an oversized mirror can compete with lighting, shelves, cabinets, and nearby walls, making the vanity area feel compressed. A large frame can amplify this effect.
Correct sizing supports these goals:
- Proportion: The mirror should relate to the vanity, sink, wall, and nearby fixtures.
- Practicality: Users should have a clear reflection at a comfortable height.
- Atmosphere: The mirror should help distribute light and reinforce the room’s sense of space.
Because mirrors reflect both light and room details, their placement matters. A well-positioned mirror can capture light or an attractive part of the room, while a poor position may emphasize clutter or awkward walls.
Choosing Mirror Width for Your Vanity
Start by measuring the full width of the vanity or sink area. The countertop width is often the most useful reference as it defines the active washing and grooming area.
A mirror comfortably within the vanity’s width creates a composed look. Visible wall space on both sides can distinguish the mirror from surrounding fittings. However, there is no universal ratio for every bathroom. The frame, wall dimensions, lighting arrangement, and number of sinks affect the result.
A wider mirror can make the room feel more spacious due to increased reflection. It can be especially useful above a double vanity. Before choosing the widest option, check for interference with cabinets, shelving, switches, or adjacent walls.
The mirror need not be perfectly centered. Intentional asymmetry can work with another feature, such as a pendant light or off-center sink. The arrangement should still look deliberate.
Lighting influences perceived width. Bright, even lighting around a mirror can make the reflective area seem more prominent. Large sconces can reduce the effect by narrowing the open wall around it.
For a double vanity, decide whether one wide mirror or two individual mirrors suits the room. One mirror creates a continuous reflection, enhancing space. Two mirrors define separate sink areas and provide more wall space for lighting between them. The choice depends on the vanity layout and available wall area.
Accounting for Mirror Height and Eye Level
Mirror height should provide a clear reflection, fitting beneath lighting and above the vanity or splashback. Measure vertically from the vanity surface or top of the splashback to the lowest fixed obstruction.
The lower edge should clear the splashback, giving the installation visual breathing room and avoiding a squeezed look. Account for the full outer dimensions of the frame, not only the reflective glass.
Eye level is crucial. The mirror should serve those who use the bathroom most. Rather than automatically centering it, ensure the reflective surface provides a practical view for both shorter and taller users. In a shared bathroom, a taller mirror offers more flexibility than a shallow horizontal design.
Vertical placement affects light reflection. A higher mirror may capture ceiling lights, while a lower one may reflect more of the vanity. Use likely reflection as part of the decision rather than treating height as a purely technical measurement.
Confirm lighting placement above the mirror, allowing space for the fixture to appear separate from the frame. For side lighting, measure the combined width of the mirror, fixtures, and desired gaps. A mirror might fit the wall alone but become too large with lighting included.
Consider wiring, outlets, switches, and mounting points, as these can influence the final position even if they don’t directly change mirror dimensions.
Finding the Right Mirror Location
Placement controls what the mirror reflects and how it distributes light. Above the vanity is usually the focal point, but it still needs to relate to the sink, tapware, lighting, and room entrance.
Stand at the bathroom door and view the proposed location. Consider whether the mirror enhances depth or reflects a visually busy area. From the vanity, confirm that the location supports comfortable use.
Natural and artificial light should inform the decision. A mirror capturing useful light can brighten the area and open the room. However, placement alone can’t correct poor lighting. Consider the mirror and lighting fixtures together.
Check clearance around wall-mounted storage. Cabinet doors, shelves, towel storage, and other fittings need space to function. Open every door before finalizing the mirror outline, as a suitable position with closed fittings may conflict when used.
If wall space is limited, mirrored storage can provide reflection and organization. A mirrored cabinet minimizes separate shelving but requires consideration of depth and door movement. Measure the cabinet body and mirrored front, noting door extension when open.
Wall surface factors like tile lines, panel joints, and changes in finish can act as alignment points. The mirror doesn’t have to match every line, but obvious near-misses can make an accurate installation seem unbalanced.
How to Prevent Mirror Fogging
Bathroom mirrors commonly fog after hot showers due to humid air condensing on cooler surfaces. In a frequently used bathroom, clarity depends on more than just the mirror.
Consider ventilation in planning. Poor ventilation contributes to persistent humidity, fogging, and other moisture issues. Ensure the room’s fan operates effectively.
Running the fan may reduce fogging, though results vary based on room size, humidity levels, fan performance, and mirror position. A fan should be part of the solution rather than a clear-surface guarantee.
Anti-fog treatments help maintain visibility post-showers. These require maintenance, so follow application directions and reapply as needed.
Some use car wax for reduced fogging. This practical maintenance option isn’t permanent, requiring periodic reapplication. Confirm compatibility with the mirror and finish before applying.
When choosing mirror placement, don’t assume alone placement will eliminate condensation. Ventilation, fan performance, shower habits, and treatments all affect mirror clarity.
How Mirror Shapes Change Visual Proportion
A mirror’s shape affects sizing, as two mirrors with similar dimensions can create different impressions.
A rectangular mirror aligns with architectural lines, often relating easily to vanities, tile layouts, and cabinets. A tall rectangle draws the eye upward, emphasizing ceiling height. A wide horizontal mirror can visually stretch the vanity wall, reflecting more room from side to side.
A round mirror softens square cabinetry and tile-dominated rooms. Its absence of corners can make it seem less visually heavy than a rectangular mirror of the same width and height. However, it offers less reflective area at the outer corners, impacting practical coverage.
An oval mirror emphasizes vertically while maintaining softer edges. Arched and irregular shapes serve as decorative features, but their outer limits still need to fit the wall area.
Measure by maximum overall width and height, including the frame. Don’t base decisions only on the central reflective area. For curved or irregular shapes, use painter’s tape to outline boundaries, then sketch the shape within it.
Shape is personal, but proportion comes first. A dramatic shape won’t fix poor relationships between mirror, vanity, and wall. Compare the shape with sink arrangement, room lines, lighting, and available reflection before selecting.
A Practical Bathroom Mirror Measuring Process
A structured approach simplifies comparing mirror sizes, ensuring nearby fixtures aren’t overlooked.
Measure vanity or sink width. Record countertop and cabinet width. If the sink isn’t centered, note its position.
Measure available wall width. Identify side walls, cabinets, shelves, light fittings, switches, and other obstructions.
Measure available height. Start at the vanity surface or splashback top, measure to the ceiling or lowest overhead obstruction.
Check eye levels. Stand at the sink, identify needed vertical reflection. Repeat for other users.
Account for lighting. Measure sconce or overhead fixture dimensions. Include visual space from lighting to mirror frame.
Include frame in dimensions. Product listings may distinguish glass size from overall size. Use total outside dimensions for fit.
Check storage and door movement. Open medicine cabinets, wall cupboards, nearby doors to ensure mirror won’t interfere.
Mark outline with painter’s tape. Create full outer dimension on wall. View from vanity, doorway, shower area, and other sightlines.
Test reflection. Consider what upper, lower, and side edges will capture. Adjust outline if reflection is impractical.
Verify all measurements before purchase. Recheck wall, mirror, frame, and fixture dimensions, confirming planned clearances.
Painter’s tape helps visualize dimensions on the wall. Leave the outline long enough to see under different lighting. If dominant, isolated, or poorly aligned, revise before installation.
Balancing Mirror Style With Room Scale
A frame changes a mirror’s apparent size. A thick, dark, or detailed frame gives a modest mirror visual weight. A slim or frameless design looks lighter, letting the reflective surface feel expansive.
Identical dimensions may not have the same effect. One may prioritize reflective area; the other, frame. Review total measurement and usable glass area.
Frame style should align with the vanity and room scale. A substantial frame anchors a large vanity but may overwhelm a narrow wall. A minimal mirror supports a clean atmosphere, but may seem underemphasized if other elements are heavy.
Color and finish affect perception too. A contrasting frame creates a defined boundary, making size noticeable, while a frame blending with the wall feels less dominant.
Consider selection as both architectural and stylistic. Evaluate:
- Proportion: How mirror relates to vanity and wall.
- Reflection: Usable glass and reflection.
- Frame: Width, finish, and visual weight impact.
Avoid selecting a frame in isolation and force-fitting dimensions into the room. The best choice physically fits while enhancing bathroom scale and character.
Final Bathroom Mirror Sizing Considerations
A bathroom mirror is both a daily-use object and major design element. Its size affects the practicality of reflection and the room’s light, balance, spaciousness, and atmosphere.
Begin with vanity or sink width, then measure available wall height and clearances. Consider eye level, splashback height, lighting fixtures, storage movement, frame dimensions, and shape. Finally, mark the outline with painter’s tape to assess the size in the room.
Avoid focusing solely on one dimension. Width, height, placement, reflection, and visual weight work together. Planning details early prevents the mirror from becoming an afterthought, helping it integrate into bathroom architecture.