How to Plan a Shower Pump Installation
Weak shower flow can make even a well-designed bathroom feel disappointing, especially when a large or dual-head shower needs more water than the existing system can deliver. Careful planning when installing a shower pump helps you choose compatible equipment, find a safe location and avoid problems with noise, air or maintenance.
Before buying a pump, identify the type of water system in the property and check the shower’s flow requirements. Plumbing and electrical work must also comply with the regulations that apply in your area.
Understanding the Purpose of a Shower Pump
A shower pump increases the pressure and flow of water reaching the shower head. It is particularly useful where a gravity-fed water system cannot create enough natural pressure for a satisfying shower.
In a gravity-fed system, water moves from a storage tank to the shower with help from gravity. If there is not enough vertical distance between the tank and the shower head, the resulting flow may be weak. A pump assists the water on its way, helping to produce a stronger and more consistent spray.
This can be valuable for:
- Large shower heads that need a higher flow
- Bar showers that require balanced hot and cold supplies
- Dual-head arrangements where two outlets may reduce the available flow
- Bathrooms positioned close to the level of the cold-water storage tank
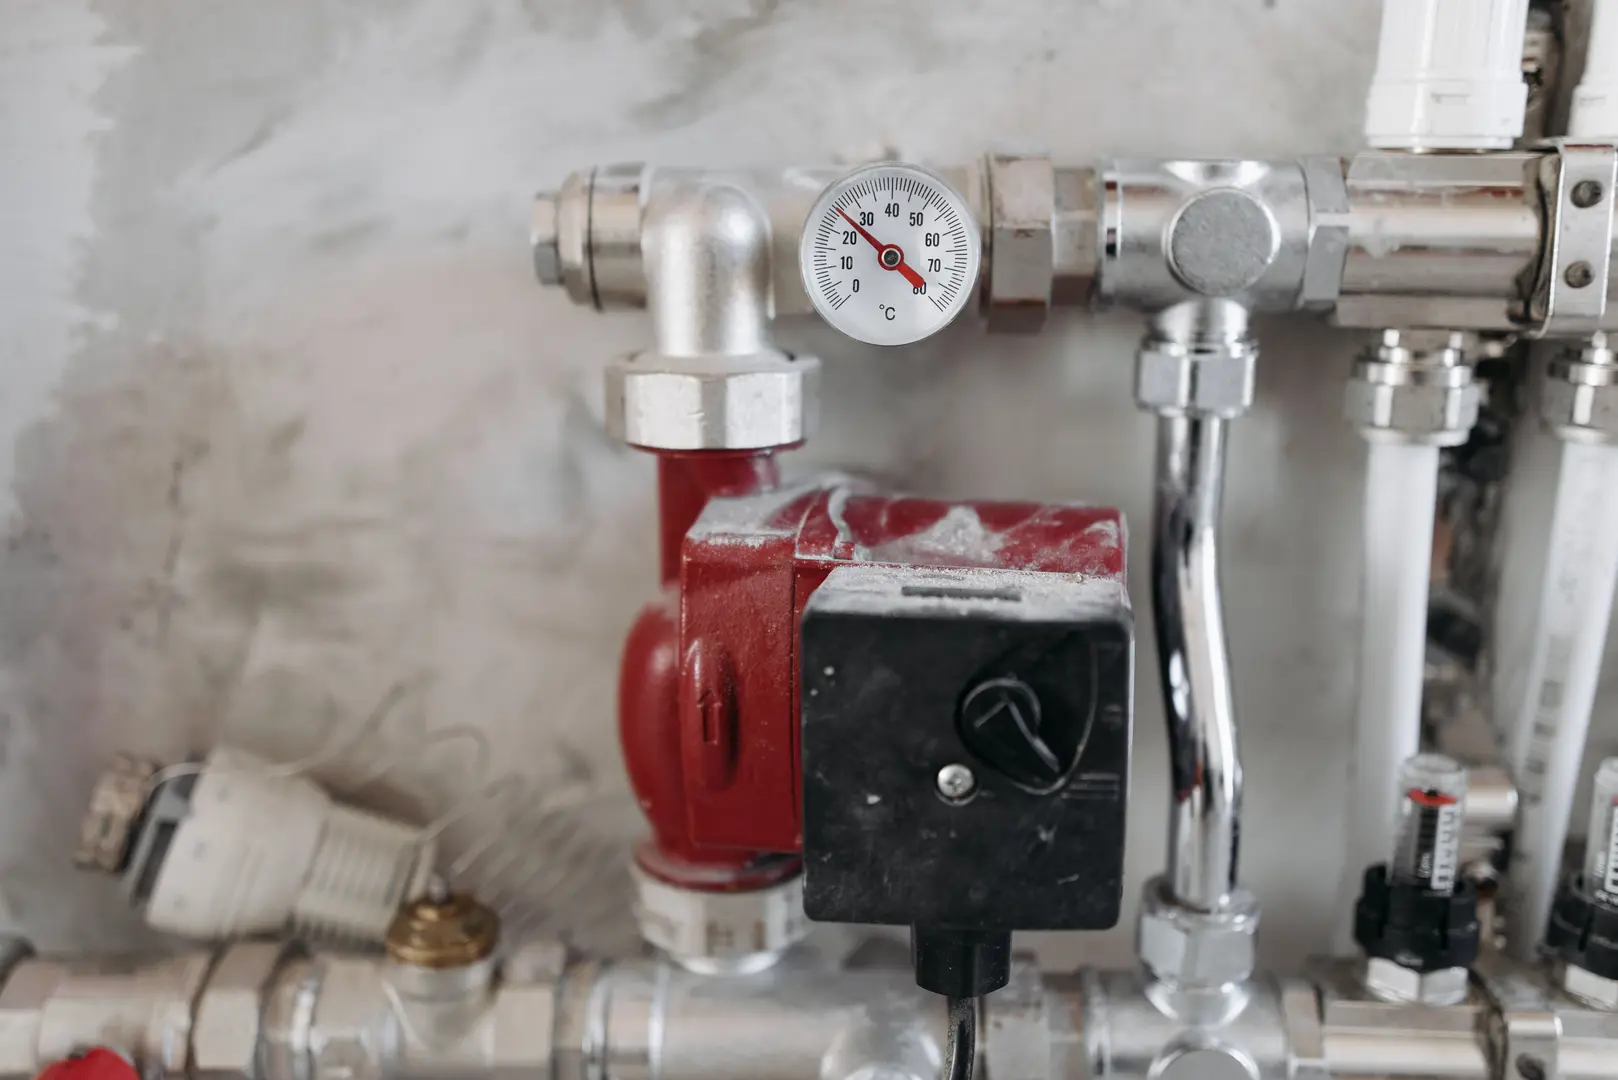
A typical shower pump is around 30 cm in size. Although relatively compact, it needs enough room for pipe connections, ventilation and future servicing. Its dimensions should therefore be considered early rather than after the bathroom layout has been completed.
How to Tell Whether Your Shower Needs a Pump
Begin by checking the existing water performance. A simple jug test can provide a basic indication of whether the pressure or flow is too low.
To carry out the test:
- Place a measuring jug beneath the shower outlet.
- Turn the shower on to the test setting.
- Time the water collection according to the jug-test method being used.
- Compare the result with the test guidance.
A result under eight seconds is treated as an indication of low pressure in this test and may justify fitting a shower pump. Make sure the same test method and measurement mark are used throughout, as different test procedures may express their results differently.
Also consider how the shower behaves in normal use. A system may struggle when a large head is installed, when both outlets of a dual-head shower operate together or when another tap is opened. A pump can improve performance, but it cannot correct every plumbing issue. Restricted pipework, blocked components, trapped air or debris should be investigated before assuming pressure is the only problem.
Choosing Between Shower Pump Types
The two principal categories are positive and negative shower pumps. The right choice depends on how the home stores and delivers water, as well as the position of the pump in relation to the tank and shower.
Do not select a pump solely by its pressure rating. First confirm:
- Whether the system is gravity-fed and open-vented
- Where the cold-water storage tank is located
- The available vertical head
- Whether one or both supplies need boosting
- The shower head’s flow requirements
- Whether the proposed pump position is accessible and safe
A pump that is unsuitable for the water system may not start reliably or may fail to provide balanced performance.
When to Use a Positive Shower Pump
A positive shower pump is intended for a gravity-fed system where there is enough natural flow to activate the pump. It relies on water beginning to move through the pipework when the shower is opened.
The installation requires approximately 10 inches of head distance. In practical terms, there must be sufficient vertical separation between the relevant water level and the shower outlet for gravity to initiate flow. The cold-water storage tank should also have a capacity of at least 225 litres so that it can support the pump’s demand.
A positive pump may be suitable when:
- The property has a gravity-fed hot and cold supply
- The storage tank is positioned above the shower
- Opening the shower already produces some natural flow
- The required head distance is available
Measure the available head carefully rather than assuming that a loft tank automatically provides enough distance. The final position of the shower head matters, especially with tall riser rails or overhead outlets.
When a Negative Shower Pump Is Suitable
A negative shower pump can be used where there is insufficient natural flow to activate a positive model. This commonly occurs when the pump or shower outlet is close to the level of the cold-water tank.
Instead of depending on gravity to initiate operation, the pump draws water from the cold tank. It must be connected to an open-vented water supply. This makes it useful in layouts where the available head is limited, including some loft conversions or bathrooms positioned high in the property.
A negative pump should not be treated as a universal solution for any low-pressure system. The water supply still needs to be compatible with the pump, and the proposed arrangement should follow the manufacturer’s installation requirements. Confirm the system type before purchasing or cutting into the pipework.
Selecting the Right Impeller Arrangement
Shower pumps are available with single or twin impellers. The appropriate arrangement depends on which water supplies need boosting.
A single-impeller pump boosts one supply, typically the hot water. It may be used where the cold supply already has suitable pressure but the gravity-fed hot water is weak.
A twin-impeller pump boosts hot and cold water together. This provides more even pressure on both sides of the shower valve, which helps the valve mix water and control temperature more effectively.
Twin impellers are often the more appropriate choice for a bar shower supplied by gravity-fed hot and cold water. Balanced delivery is especially important where a large or dual-head shower places greater demand on the system. However, both sides must be connected in accordance with the pump and shower requirements.
Regenerative Versus Centrifugal Pump Designs
The internal design of a pump affects how it moves water and how much operating noise it may produce.
A centrifugal pump uses curved vanes to move water through the unit. Centrifugal models are generally quieter, making them worth considering when the pump will be positioned near a bedroom or another noise-sensitive area.
A regenerative pump moves water through a peripheral channel. This design can provide effective boosting, but it may be more noticeable in operation than a comparable centrifugal model.
Noise should not be the only selection factor. The pump still needs to provide the appropriate pressure and flow for the shower. Installation quality and the mounting surface will also have a significant effect on the amount of vibration transmitted through the building.
How to Choose a Pump for a Bar Shower
A bar shower mixes hot and cold water, so both supplies need to reach it at suitable and reasonably balanced pressures. Start by checking the size and intended flow of the shower head. A large overhead head or dual-head arrangement is likely to demand more water than a small handset.
Pump pressure ratings help match the unit to the shower’s needs. Avoid assuming that the highest rating is automatically the best choice. Instead, consider:
- The flow required by the shower head
- Whether one or two outlets may operate at once
- The available stored-water supply
- Whether hot and cold water both need boosting
- The shower manufacturer’s pressure and flow guidance
Dual-head systems deserve particular attention. Dividing the available water between two outlets can result in weaker performance, even if one head works well by itself. Choose a pump based on the intended operating arrangement rather than testing only a single outlet.
Positioning and Fitting the Shower Pump
Decide on the pump location before finalising pipe routes and electrical work. A common planning mistake is to place the pump where plumbing is convenient but power, ventilation or maintenance access is poor.
The unit should remain accessible after installation. Leave enough room to reach isolating valves, inspect connections and remove or service the pump without dismantling major bathroom fittings.
When choosing a position:
- Check the relationship between the pump, tank and shower.
- Keep pipe routes practical and properly arranged.
- Provide access to valves and connections.
- Make sure the pump is not enclosed so tightly that heat becomes trapped.
- Plan the electrical supply at the same time as the plumbing.
- Follow the pump manufacturer’s positioning instructions.
Careful fitting reduces the likelihood of leaks, air entering the supply or strain being placed on the pump connections. If the system layout is uncertain, use an experienced plumber to confirm compatibility and positioning.
Keeping a Shower Pump Installation Safe
A shower pump combines water, electricity and a motor that produces heat. Safe positioning and installation are therefore essential.
Do not place the pump where water can collect around it or where it could be exposed to leaks from nearby fittings. It also needs suitable space around it to avoid overheating. Covering the unit, packing insulation tightly around it or placing it in an unsuitable confined space can interfere with heat dissipation.
The installation should account for:
- Safe separation of electrical components and water
- Adequate ventilation around the pump
- Secure and suitable pipe connections
- Access for inspection and maintenance
- Compliance with applicable plumbing and electrical requirements
Always follow the manufacturer’s installation limits. Those instructions should determine the permitted orientation, location, pipe arrangement and electrical connection method.
Electrical Safety Guidelines for Shower Pump Installation
Bathroom electrical work must comply with the safety regulations applicable to the property’s location. Wet areas are subject to specific requirements, so the power supply should be designed and installed by a suitably qualified person.
Do not simply run an external plug beneath a bath because it appears convenient. A plug and socket arrangement in that location may breach electrical requirements or create an unsafe installation.
There is sometimes disagreement over whether a mains socket under a bath is acceptable. The answer depends on the relevant regulations and the precise installation conditions, including location, accessibility and required protection. It should not be assumed that placing a socket behind a bath panel automatically makes it compliant.
The safer planning approach is to:
- Check the pump manufacturer’s electrical instructions.
- Have the supply assessed by a qualified electrician.
- Use an approved connection method for the location.
- Keep electrical connections away from potential leaks.
- Ensure the pump can be isolated safely for maintenance.
Electrical compliance should be confirmed before the pump is fitted, not left until the plumbing work is complete.
Ways to Reduce Shower Pump Noise
Some operating sound is expected, but poor mounting can amplify vibration through floors and nearby walls. A firm concrete foundation can help dampen movement and reduce transmitted noise.
Do not screw the pump directly to the floor. A rigid fixing can transfer vibration into the floor structure, making the unit sound louder elsewhere in the property.
For quieter operation:
- Place the pump on a solid, stable concrete base.
- Avoid direct screw fixing to floorboards.
- Ensure connected pipes are not placing strain on the unit.
- Choose an accessible position where the pump is not touching surrounding surfaces.
- Consider a centrifugal design when low operating noise is a priority.
Unusual noise can also indicate trapped air or an unsuitable water supply. Mounting measures will not correct those underlying installation problems.
Preparing the Shower Pump Water Supply
Fit isolating valves to the relevant supply pipes. These allow the pump to be shut off for servicing without unnecessarily draining or disabling more of the water system.
Where appropriate, 22 mm pipework is preferred because it can provide a suitable supply to the pump. Pipe sizing and routing should still follow the unit manufacturer’s instructions.
The supply arrangement should prevent air and debris from reaching the pump. Both can impair performance: air may cause irregular operation, while installation debris can obstruct internal components.
Before making the final connections:
- Prepare and clean the pipework carefully.
- Fit accessible isolating valves.
- Check that pipe routes will not encourage trapped air.
- Flush out debris before connecting the pump.
- Inspect all connections for correct alignment.
- Confirm that the stored-water supply is adequate.
Do not allow solder, pipe fragments or other installation residue to enter the unit.
Priming the Pump Before Switching It On
A shower pump must be primed before electrical operation. Priming fills the pump and connected pipework with water, helping to remove trapped air and preventing the unit from starting without a proper water supply.
With the electrical power still off, open the water supply and allow water to pass through the system. Open the shower controls as required and wait until water flows clearly and consistently. An irregular or spluttering stream suggests that air may still be present.
Before switching on, confirm that:
- The isolating valves are open.
- The pump and supply pipes are full of water.
- Water flows clearly from the shower.
- Trapped air has been released.
- Connections have been checked for leaks.
Only operate the pump after priming is complete. This final check supports reliable performance and protects the installation from avoidable problems caused by air trapped in the system.