A Practical Shower Trays Buying Guide
Choosing the right shower tray involves more than matching its dimensions to an enclosure. Shape, height, material, drainage, accessibility and installation conditions all affect how well it performs. This shower trays buying guide explains the main options and the practical checks to make before purchasing.
Understanding the Purpose of a Shower Tray
A shower tray forms the floor of the shower enclosure. Its main job is to contain water and direct it towards the waste outlet rather than allowing it to spread across the bathroom.
A correctly installed tray also protects the subfloor from moisture. This makes accurate fitting, stable support and effective sealing just as important as the tray’s appearance.
When comparing trays, consider:
- Whether the shape fits the available corner or wall space
- Where the waste outlet must connect to the plumbing
- How easily users can step into the shower
- Whether the floor can support and accommodate the tray
- How the tray will work with the chosen enclosure or screen
Which Shower Tray Shape Is Right for Your Bathroom?
Shape determines how a shower fits into the room and can influence internal space, enclosure compatibility and water flow. Start by measuring the full installation area rather than relying on the size of an existing enclosure. Also check nearby doors, bathroom fittings and access routes.
Square Trays
Square trays have equal-length sides and can be fitted against a wall or into a corner. Their balanced proportions make them straightforward to coordinate with a matching square enclosure.
They are often a practical choice for compact bathrooms because they use a relatively contained area. However, their symmetrical footprint can feel enclosed, particularly when combined with inward-opening doors or bulky shower fittings.
Before selecting one, confirm that the internal showering area provides enough room for comfortable movement. The external dimensions do not always represent the full usable space once the enclosure and controls are installed.
Rectangular Trays
A rectangular tray is longer than it is wide. It can sit against a wall or in a corner and generally provides more room to move than a similarly positioned square design.
This format is especially suitable for larger enclosures and walk-in showers. The additional length can create a more open showering area and provide space for a fixed glass panel.
The trade-off is that a rectangular tray requires more floor area. Careful alignment is also important, particularly where a long screen, enclosure frame or tiled wall must meet the tray edge. Check that the room can accommodate the complete arrangement without restricting doors or access to other fixtures.
Quadrant and Offset Quadrant Designs
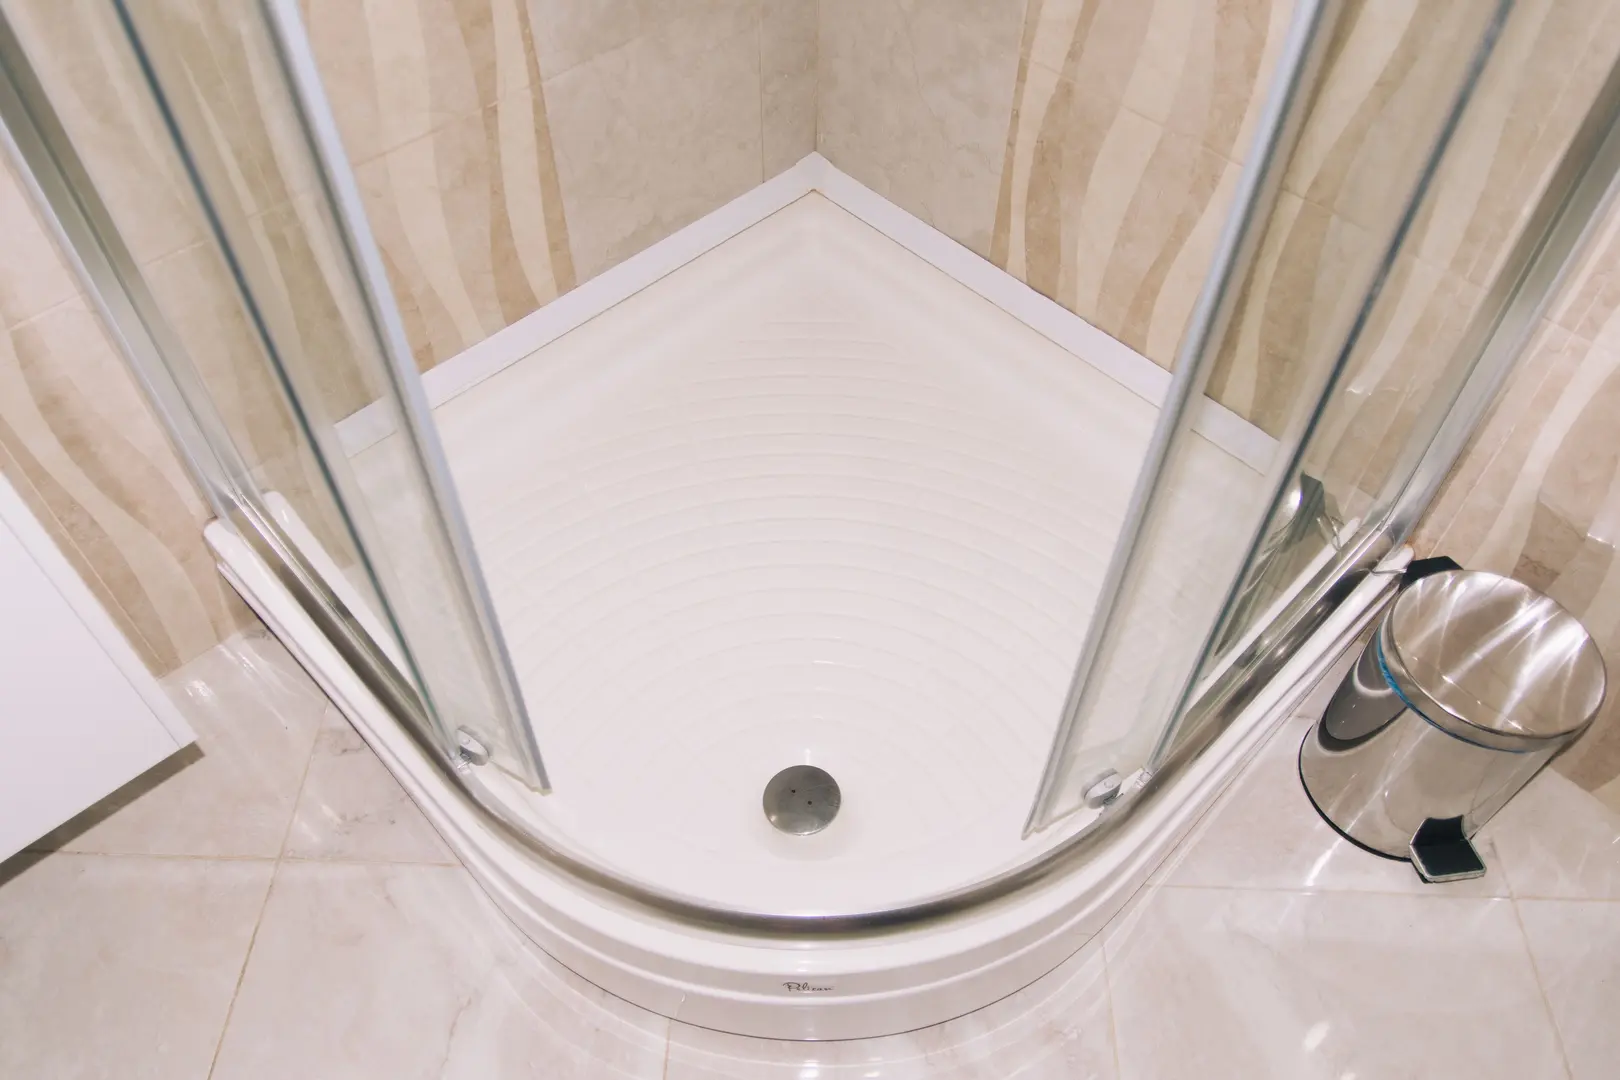
Quadrant trays are designed for corner installation. They have two straight sides that meet the walls and a curved front that projects into the room. The curved profile reduces the amount of bathroom floor occupied by the enclosure, making it useful where space is limited.
The shape may provide less internal room for movement or toiletries than a larger square or rectangular tray. It also needs a compatible curved enclosure.
An offset quadrant follows the same principle but extends farther along one wall. This creates more internal space while retaining a curved outer edge. Check the orientation carefully, as the longer side must match both the room layout and the enclosure.
Choosing the Best Shower Tray Height
Tray height affects access, drainage, appearance and the wider bathroom layout. A low tray can create a streamlined finish, while a raised design may make it easier to accommodate pipework beneath it.
Consider who will use the shower and whether stepping over a raised edge could be difficult. The position and available fall of the drainage connection also matter. A visually appealing low-level installation will only work properly if water can move efficiently towards the waste.
Low-Level Shower Trays
Low-level trays sit close to the surrounding floor. They offer a modern, unobtrusive appearance and reduce the step needed to enter the shower.
They are well suited to contemporary enclosures and walk-in arrangements, but effective drainage is essential. The floor and plumbing layout must allow the waste to be connected without compromising the tray’s stable position.
A low edge also provides less physical containment than a deep tray, so the screen and showerhead should be arranged to control splashing.
Raised Shower Trays
Raised trays create space beneath the shower floor for the waste connection and other plumbing. This can simplify installation where pipes cannot be recessed into the floor.
The extra space may also make plumbing easier to access, depending on the tray and support system. However, a raised installation creates a higher step into the shower and gives the base a bulkier appearance.
This option is often chosen for practical reasons. Make sure the finished height remains comfortable and that any supporting structure is stable and suitable for the tray.
Deep Shower Trays
Deep trays have taller sides and contain water more like a shallow basin. This can offer additional reassurance where greater water containment is desirable.
Their height makes them less accessible than low-level options. The deeper interior and taller edges may also require more cleaning because there is more surface area around the base.
A deep tray can have a strong visual presence, so consider how it will work with the enclosure, bathroom fittings and available space before buying.
Tile-Ready Wetroom Trays
Tile-ready wetroom trays are installed at or near floor level and then tiled over. They create a continuous surface that can make the shower area feel integrated with the rest of the bathroom.
These trays require more involved installation than standard finished trays. The base, drainage, tile finish and waterproofing must work together. Accurate positioning and careful preparation are therefore particularly important.
Tile-ready systems provide design flexibility, but the completed result depends on the quality of the full installation rather than the tray alone.
Walk-In Shower Tray Options
Walk-in trays are generally low-level designs used with an open entrance and one or more glass panels. Their open format can feel spacious, provides convenient access and reduces the number of enclosure components that need routine cleaning.
They require enough room to control splashing without a fully enclosed door. In a small installation, water may escape beyond the tray if the screen is too short or the shower flow is directed towards the opening.
Plan the complete layout—including tray, screen, showerhead and entrance—rather than choosing each part separately.
Shower Trays with Slip-Resistant Surfaces
Slip-resistant shower trays have textured surfaces intended to improve grip underfoot and reduce the risk of slipping. They can be helpful in family bathrooms and for users who want greater confidence when entering or leaving the shower.
Texture can hold more residue than a completely smooth finish, so these trays may need more attentive cleaning. Follow the supplier’s care guidance and avoid cleaning methods that could damage the surface.
Slip resistance is only one aspect of safe use. Good drainage and regular cleaning remain important because standing water and surface buildup can affect the shower floor.
Comparing Shower Tray Materials
Material influences weight, strength, price, comfort and maintenance. It can also affect installation: a lightweight tray may be easier to position, while a heavier one requires a floor and handling plan suitable for its weight.
Compare materials according to the bathroom’s practical requirements rather than appearance alone.
Acrylic Shower Trays
Acrylic trays are made from lightweight plastic and are typically reinforced to provide support. Their relatively low weight makes them easier to handle, and they are generally an affordable option.
The smooth finish is simple to clean, making acrylic suitable for bathrooms where easy maintenance is a priority. However, it is less solid than heavier materials and may flex if it is not supported correctly. It may also offer less long-term durability than stone resin or ceramic.
A stable base is particularly important. The tray should not move when weight is applied.
Stone Resin Shower Trays
Stone resin trays combine crushed stone with resin to produce a dense, solid base. They have a substantial feel and resist everyday wear well.
Their strength and appearance make them popular for modern shower spaces, including larger rectangular and low-level installations. The disadvantages are greater weight and a higher cost compared with basic acrylic options.
Before purchase, check whether the tray can be transported into the bathroom and whether the floor can support it. Installation may require more than one person because of the weight.
Ceramic Shower Trays
Ceramic trays are made from glazed clay and have a traditional, familiar appearance. Their hard surface is durable and easy to coordinate with other ceramic bathroom fittings.
The glazed finish can become slippery when wet unless the tray includes an appropriate textured surface. Ceramic may also chip if struck by a hard object.
These trays can be heavy, so floor stability and safe handling should be considered before installation. Inspect the surface and edges before fitting because damage will be harder to address after the enclosure is in place.
Slate-Style Shower Trays
Slate-style trays recreate the textured appearance of natural stone. They can provide a distinctive finish while offering the durability expected from a solid shower base.
Their surface texture may provide more visual depth and grip than a smooth tray, but it can also demand more cleaning. Soap residue and deposits may be more noticeable within an uneven finish.
Check the manufacturer’s cleaning guidance before using strong products or abrasive tools. The aim is to remove buildup without altering the texture or appearance.
Bases Designed for Tiling
Tile-over bases allow the shower floor to be finished in tiles that coordinate with the surrounding bathroom. This creates a customised, continuous look and offers considerable design flexibility.
Installation is more complex than placing a tray with a ready-made surface. The base must be positioned correctly, and the tiles, drainage and waterproofing must form a complete system. The finished surface also needs to guide water effectively towards the outlet.
Tile size, joints and surface texture will affect cleaning and comfort, so choose the finish with everyday use in mind.
Should You Choose a Tray with an Upstand?
An upstand is a raised lip around one or more edges of a shower tray. It sits behind or against the wall finish and supports waterproofing at the junction between the tray and wall.
This raised edge can help prevent water from finding its way behind tiles or wall panels, reducing the potential for leaks and damp. It is particularly useful where the wall-to-tray joint needs additional protection.
However, upstands can limit enclosure and installation choices. Confirm that the upstand positions match the walls and that the intended screen or enclosure is compatible. A tray with an incorrectly positioned upstand may not suit the planned layout.
A tray without an upstand offers more flexibility, but the wall junction must still be sealed correctly and monitored over time.
Essential Shower Tray Installation Guidance
Reliable installation begins with a level, stable floor. If the tray rocks, shifts or lacks support, joints and seals can be placed under unnecessary strain.
Use this basic sequence:
- Inspect the floor and plumbing. Confirm that the base is stable and that the waste position is workable.
- Read the tray instructions. Support, sealing and fitting requirements can vary.
- Test-fit the tray. Check its position, level, waste alignment and enclosure clearance before fixing it permanently.
- Connect and check the drainage. Make sure water can reach the waste without escaping at a joint.
- Secure the tray correctly. Use the specified support or installation system.
- Seal the finished junctions. Apply appropriate sealant where required after the tray and surrounding finishes are correctly positioned.
- Allow the installation to settle as directed. Do not rush into fitting or using other components before the relevant fixing and sealing stages are complete.
If the floor, drainage or waterproofing needs significant alteration, professional installation may be the most dependable approach.
How to Avoid Common Shower Tray Installation Mistakes
Improper installation can lead to leaks and water damage. Several avoidable errors account for many practical concerns:
- Do not fit onto an unstable surface. Correct movement or unevenness before placing the tray.
- Do not skip the test fit. Confirm dimensions, orientation and waste alignment before final fixing.
- Do not force the drainage connection. Poor alignment can place stress on joints.
- Do not assume walls are perfectly straight. Check how the tray and enclosure meet the actual surfaces.
- Do not rely on sealant to correct a poor fit. Sealant supports a properly prepared joint; it should not compensate for movement or large gaps.
- Do not overlook tray orientation. This is especially important for offset quadrant trays and models with upstands.
- Do not install the enclosure before confirming stability. The tray should be secure, level and correctly connected first.
After fitting, check the drainage and surrounding joints carefully before putting the shower into regular use.
Shower Tray Checks and Long-Term Maintenance
A pre-purchase inspection can uncover plumbing or floor issues that would otherwise appear during installation. Check the existing waste location, available space beneath the floor, condition of the base and signs of previous moisture problems. This requires time and sometimes professional input, and it cannot reveal every concealed issue, but it can reduce unexpected complications.
Once installed, regular maintenance helps prevent small problems from becoming major ones:
- Clean the surface often enough to prevent residue buildup.
- Keep the waste outlet clear so water drains efficiently.
- Inspect seals around the tray, walls and enclosure.
- Look for movement, cracks, chips or changes in drainage.
- Address persistent standing water or damp promptly.
- Use cleaning methods suitable for the tray material and texture.
A well-chosen tray still depends on sound installation and ongoing care. Matching the shape, height and material to the bathroom—and checking the plumbing before purchase—provides the strongest foundation for a durable, practical shower.