Tips for Installing a Subway Tile Backsplash: A Step-by-Step Guide
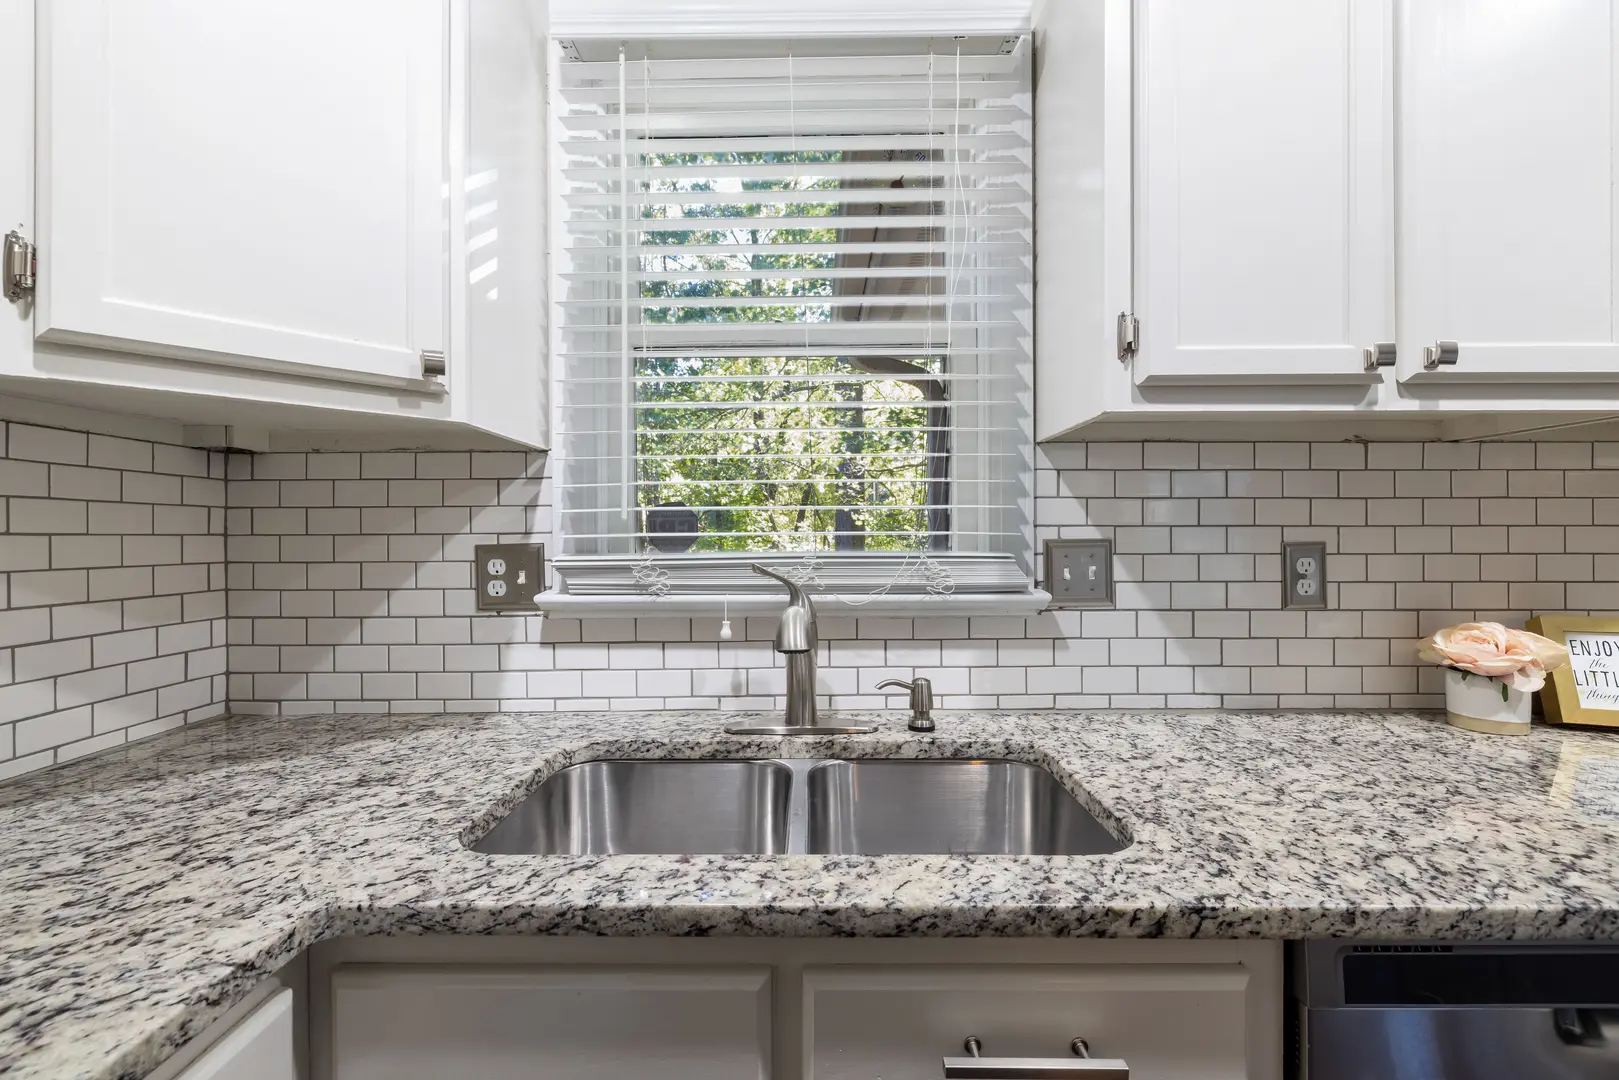
A subway tile backsplash is a practical DIY project that can give a kitchen, bathroom, laundry room, or utility space a clean, polished appearance. Although the installation process is straightforward, careful planning and surface preparation make the difference between uneven tilework and a professional-looking result. These Tips for Installing Subway Tile Backsplash cover every stage, from measuring the wall to sealing the finished grout.
Understanding Subway Tile Backsplashes
Subway tiles are rectangular tiles traditionally sized at approximately 3 by 6 inches. They are commonly installed in a staggered, brick-like arrangement, with each row offset from the one below it.
The familiar rectangular shape creates a simple, orderly surface without making the room feel overly busy. While the running-bond pattern is the classic choice, rectangular subway tiles can also support other layouts. Tile color, grout color, surface finish, and orientation can all change the overall effect.
A subway tile backsplash protects the wall while also creating a finished transition between countertops, cabinets, sinks, and other features. Because the pattern depends on straight courses and repeated grout joints, precise layout and consistent spacing are especially important.
Reasons to Choose a Subway Tile Backsplash
Subway tile remains popular for several practical and decorative reasons:
- Timeless appearance: The straightforward rectangular shape works well in both traditional and contemporary spaces.
- Design versatility: Subway tile can complement a wide range of cabinet colors, countertops, fixtures, and decorative styles.
- Flexible layouts: Although the staggered brick pattern is the most recognizable, the tile shape allows for other arrangements when a different look is desired.
- Easy maintenance: The smooth tile faces are generally easy to wipe clean during routine care.
- Adaptable color choices: Neutral tile can create a quiet background, while colorful tile or contrasting grout can make the backsplash more noticeable.
The result can be subtle or bold depending on the materials selected. This flexibility makes subway tile suitable for both small updates and complete renovations.
Essential Tools and Materials for the Job
Gathering everything before starting helps prevent interruptions after the adhesive has been spread. The core tools and materials include:
- Subway tiles
- Tile adhesive suitable for the wall and tile
- Tile spacers
- Tile cutter
- Grout
- Grout sealer
- Notched trowel
- Rubber grout float
- Clean sponge
- Buckets for mixing and cleanup
- Measuring tape
- Pencil or removable marking tool
- Level or straightedge
You may also need suitable wall-repair materials if the surface is rough, cracked, or uneven. Choose all products according to the tile type and installation surface. Adhesive, grout, primer, and sealer are not automatically interchangeable, so read their labels and follow the manufacturers’ directions.
How to Prepare Before Installing the Tiles
Good preparation begins before opening the adhesive. You need to determine the installation area, decide how the tile pattern will meet edges and openings, and make sure the wall is capable of supporting a neat layout.
This stage also helps answer an important DIY question: How difficult is it to install a backsplash? The work is manageable for many careful do-it-yourselfers, but it requires patience. Cutting around outlets, keeping rows level, and correcting wall imperfections usually demand more attention than placing full tiles across an open area.
Preparation Steps Before Tiling
Start by examining the entire wall in strong, even light. Look for high spots, depressions, old adhesive, loose material, and other imperfections. A rough surface can make tiles project at different depths and can interfere with adhesive contact.
Smooth or patch uneven areas with a wall-repair material appropriate for the substrate and the tile installation. Do not assume that a thicker layer of tile adhesive will compensate for a badly prepared wall. Correcting the surface first supports better adhesion and makes it easier to produce a flat, professional-looking tile face.
Renovation order also matters. Plan the relationship between the backsplash, countertop, and cabinets before tiling. In many projects, cabinets and countertops establish the boundaries for the backsplash. In other designs, tile may cover a larger wall area. Either approach requires coordination.
Installing tile without considering cabinet placement can lead to awkward alignment, covered tile edges, or support and fitting problems. Confirm where the cabinets, countertop, trim, and tile will end before beginning. The backsplash should fit the planned room layout rather than forcing later cabinet adjustments.
Measure the Space and Create a Tile Plan
Measure the height and width of each wall section that will receive tile. If the backsplash includes multiple sections, calculate each area separately and combine the totals.
Use those measurements to determine how much tile is required. Include enough material to account for partial tiles, pattern alignment, and tiles that may be damaged during cutting. It is better to plan for cuts before installation than to discover halfway through the work that the layout requires more tile.
Next, sketch the wall and identify:
- Inside and outside edges
- Countertop boundaries
- Cabinet lines
- Corners
- Outlets and other openings
- Areas requiring narrow or partial tiles
The plan does not need to be elaborate. Its purpose is to reveal where the pattern starts, where it finishes, and how visible cuts will be distributed.
Clean and Repair the Wall Surface
Adhesive needs a clean, stable surface. Remove dust, grease, residue, and loose material from the wall. If the previous backsplash or wall covering left adhesive behind, remove or smooth it so it does not affect the new tile plane.
Repair dents, holes, cracks, and uneven patches before tiling. Allow repair materials to dry or set according to their instructions, then smooth the surface as needed. Wipe away sanding dust and other debris before moving to the installation stage.
Check the wall again with a level or straightedge. A small amount of planning here can prevent rows from drifting or tile faces from appearing uneven later.
Consider Applying Primer to Porous Areas
Porous wall areas may absorb moisture from tile adhesive unevenly. Applying a compatible primer can improve adhesion and create a more consistent installation surface.
Primer is not necessary for every wall or every adhesive. Check the instructions for the wall-repair material, substrate, and adhesive before using it. If primer is recommended, apply it evenly and let it dry as directed before spreading adhesive.
Steps for Installing the Subway Tile Backsplash
Once the surface is clean, repaired, and properly planned, the installation can begin. Work methodically rather than trying to cover the entire wall at once. Recheck alignment throughout the process, especially around corners, edges, and openings.
Establish the Layout Before Tiling
Mark the center of the wall or of the main visible installation area. Use this point to evaluate how the tile pattern will extend toward both ends.
Dry-fit a row without adhesive. Include spacers so the test layout reflects the actual grout joints. This allows you to see whether the ends will require very narrow pieces or whether shifting the starting point will create a more balanced appearance.
Also dry-fit enough of the staggered pattern to understand how alternate rows will terminate. A layout that works for the first row may produce difficult cuts in the second.
Mark level reference lines to guide the installation. Verify the countertop or other lower boundary rather than assuming it is perfectly level. Your reference marks will help keep the tile courses straight as work progresses.
Spread the Tile Adhesive Correctly
Prepare the adhesive exactly as directed by its manufacturer. If the product requires mixing, follow the specified process and working guidance on the package. Use an adhesive approved for both the tile and the wall surface.
Spread the adhesive over a small, manageable section using the flat side of the trowel. Then use the notched edge to create consistent ridges. Holding and moving the trowel uniformly helps produce an even adhesive bed.
Avoid covering too much wall at one time. Working in smaller sections gives you time to place, space, and adjust the tiles before the adhesive begins to set. Do not apply an unnecessarily thick layer. Excess adhesive can squeeze into the grout joints and create additional cleanup.
Set the Tiles with Consistent Spacing
Press each tile into the adhesive with controlled, even pressure. Make sure the tile is seated securely without forcing excessive adhesive into the surrounding gaps.
Insert spacers between tiles to keep grout lines uniform. Spacers are especially helpful in the traditional running-bond layout because a small spacing error can become more noticeable as rows accumulate.
Continue checking:
- The level of each row
- The alignment of vertical joints
- The offset between staggered rows
- The flatness of neighboring tile faces
- The amount of adhesive entering the joints
Make adjustments while the adhesive remains workable. Remove adhesive from tile faces and grout gaps before it hardens, taking care not to disturb the alignment.
Measure and Cut Tiles for Edges and Openings
Partial tiles will usually be required along wall edges, beneath cabinets, and around openings. Measure each space individually rather than assuming similar-looking areas are identical.
Account for the planned grout gap when marking the tile. Double-check the mark and orientation before cutting, particularly when the piece must fit on a specific side of an opening.
Use a tile cutter appropriate for the tile material and type of cut. Make cuts carefully, then dry-fit each piece before applying it. A dry fit lets you confirm that the piece follows the pattern and leaves a consistent surrounding gap.
Install cut edges neatly at the planned boundaries. Continue checking the overall row after adding each partial piece so the cut does not pull adjacent tiles out of alignment.
Fill the Joints with Grout
Allow the tile adhesive to set according to the manufacturer’s instructions. Once it is ready, remove the spacers and clear loose adhesive or debris from the joints.
Prepare the grout as directed. Using a rubber float, spread it across the tile surface and work it firmly into the joints. Move the float from more than one direction so the spaces fill evenly.
After filling the joints, hold the float at an angle and remove excess grout from the tile faces. Work in manageable sections and follow the grout manufacturer’s timing instructions for initial cleanup.
Wipe Away Grout and Clean the Tile Faces
Use a damp—not dripping—sponge to wipe excess grout from the tiles. Rinse the sponge frequently so you are removing residue rather than redistributing it.
Avoid scrubbing aggressively or repeatedly passing over fresh joints, as this can disturb the grout. Shape and clean the lines gently while keeping them consistently filled.
After the grout sets as instructed, complete the final cleaning of the tile faces. Use the method recommended by the grout manufacturer to remove remaining residue without damaging the joints. Inspect the backsplash from different angles to find haze that may not be visible straight on.
Protect the Finished Grout with Sealer
Let the grout dry fully before applying sealer. Drying requirements vary, so use the grout and sealer manufacturers’ instructions rather than choosing an arbitrary waiting period.
Apply the grout sealer evenly to the joints and remove unwanted residue from the tile faces as directed. Sealing helps protect the finished grout and makes routine care easier. If the chosen grout does not require a separate sealer, follow its specific product guidance.
Best Practices for a Successful Installation
A few habits can make the installation more controlled and predictable:
- Use quality materials. Select tile, adhesive, grout, and sealer that are compatible with one another and with the wall surface.
- Work in small sections. Spread only enough adhesive or grout to handle comfortably before the material begins to set.
- Follow manufacturer instructions. Mixing, application, working, drying, and sealing requirements can differ between products.
- Dry-fit before committing. Test the layout and cut pieces before placing them in adhesive.
- Check alignment frequently. Do not wait until several rows are complete to verify level and spacing.
- Keep joints clean. Remove adhesive from grout spaces while it is still workable.
- Measure every cut. Walls, corners, and openings may not be perfectly uniform.
- Be patient during cleanup. Cleaning too early can disturb grout, while waiting too long may make residue harder to remove.
The goal is steady, consistent progress. Speed is less important than maintaining the pattern and correcting small issues before they affect the rest of the wall.
Installation Errors You Should Avoid
The most common problems often begin before the first tile is placed. Avoid these mistakes:
- Skipping surface preparation: Tile will not hide a rough, dirty, or damaged wall. Clean, patch, and smooth the installation area first.
- Failing to coordinate with cabinets: Decide how the backsplash relates to cabinets and countertops before installation to prevent alignment and fitting issues.
- Starting without a dry layout: This can leave conspicuously narrow cuts at visible edges.
- Applying too much adhesive: Excess material may squeeze between tiles, interfere with grout, and make cleanup more difficult.
- Spreading adhesive over too large an area: The material may begin setting before the tiles can be positioned and adjusted.
- Ignoring spacers or reference lines: Small alignment errors can build across multiple rows.
- Cutting without rechecking measurements: Incorrect or reversed cuts waste tile and interrupt the pattern.
- Cleaning grout incorrectly: Too much water or aggressive wiping can affect the appearance of the joints.
- Neglecting grout sealer: When the selected grout requires sealing, leaving this step undone reduces the protection of the finished joints.
- Ignoring product instructions: Adhesive, grout, primer, and sealer each have specific application and drying requirements.
Careful planning, a smooth wall, consistent spacing, and patient cleanup are the foundations of a successful subway tile backsplash. By treating each stage as part of the finished design, a DIY installer can create an orderly, durable-looking result without rushing the process.